Tag: kid friendly

Grain-Free Pancake Pockets

Grain-Free Pancake Pockets

Do you enjoy pancakes and eggs? Do you have your old sandwich maker lying around? If the answer is yes, you’re in for a real treat! This Grain-Free Pancake Pocket recipe is simple to make and extremely fun to eat!!! If you can prepare pancake 

Apple Cinnamon Nut Muffins (Grain-free, Dairy-free, Egg-free)

Apple Cinnamon Nut Muffins (Grain-free, Dairy-free, Egg-free)

Have you ever had a best friend be right there with you as you struggled through a really hard time? That’s what these Apple Cinnamon Nut Muffins were for me on my quest to eliminate gluten, dairy, soy, sugar, and eggs from my diet! These 

Cassava (Yuca) Latkes (Gluten-Free, Grain-Free, AIP, Vegan, Paleo)

Cassava (Yuca) Latkes (Gluten-Free, Grain-Free, AIP, Vegan, Paleo)

A stack of Cassava Latkes with a dollop of applesauce with dreidels and menorah

I can’t think of any better way to say Happy Chanukah than with Cassava Latkes!!! (Although they’re also the perfect appetizer or side dish any day of the year!) These latkes are crispy on the outside, and slightly chewy in the very center. DELICIOUS! These Cassava Latkes are eggless, gluten and grain-free, and since they’re made with yuca/cassava instead of potatoes, they have a much lower glycemic index than traditional potato latkes. (That’s a huge plus for people with blood sugar issues like me!)

I used Goya Frozen Grated Cassava, which made these latkes super easy to make – no grating! They can also be made by grating fresh yuca/cassava. So simple! So yummy! Especially with a dollop of applesauce!

I’m literally Crazy For Yuca, as this root vegetable can be made into an endless number of exciting things!!

New to cooking with yuca?

Check out my pages: Getting to Know Yuca (Cassava) and Yuca (Cassava) Nutrition Facts


Just a few simple ingredients are needed to make Cassava Latkes!

-fresh yuca/cassava or frozen grated cassava. (I can often find Goya Frozen Grated Cassava at Wal-Mart)

*If using fresh yuca, check out my page: Buying, Storing, Peeling, & Cooking Fresh Yuca (Cassava.)

-onion

-fresh garlic

-oil (I used Chosen Foods 100% Pure Avocado oil)

-salt (I used pink Himalayan salt because of its high mineral content.)

-organic applesauce (I used Trader Joe’s)


*This recipe is by Julie from FlashFictionKitchen.com

Check out Julie’s full recipe by clicking link below.

Cassava Latkes With Applesauce & Coconut Sour Cream (Paleo, AIP, Vegan)


See below for other creative latke recipes using fresh yuca or cassava flour!


Here are my pictures of the making of these scrumptious Cassava Latkes!


Bowl of grated cassava

A bowl of defrosted Goya Frozen Grated Cassava.


Combine grated cassava, minced onion and garlic, salt, and oil (I also added a pinch of fresh black pepper.)

Place spoonfuls of the cassava mixture into pan to form desired sized latkes, once oil has been heated. Flatten so they aren’t too thick. The thinner they are, the crispier your latkes!

Frying 3 Cassava Latkes in pan.


Once latkes brown all around the edges, flip and cook on the other side. They should be a nice golden color!

Frying 3 Cassava Latkes in pan.


Once cooked on both sides, place on a plate covered with paper towel to remove excess oil. Be careful though, yuca is sticky and if any parts of the latkes aren’t fully browned they may stick a bit to the paper towel.

Serve!

Cassava Latkes on white plate with applesauce and scallion garnish.

Cassava Latkes stacked on white plate with a side of applesauce.


Cassava Latke Taco!

Get creative with your latkes! Wrap them around taco seasoned organic, grass-fed beef and guacamole!Cassava Latke Taco with a side of salsa.


***


Black banner with red and white writing inviting readers to comment below and share their pictures on @CrazyForYuca on Instagram


CLICK HERE TO SHOP

FOR YUCA CHIPS

AND FOR PANTRY ITEMS & KITCHEN GADGETS I PERSONALLY USE TO MAKE CRAZY FOR YUCA RECIPES!


Siete, Plant Wise, Artisan Tropics, and Jan's yuca / cassava chips.


*By ordering recommended products through our website we get a small percentage of the sale which helps to support the maintenance of Crazy For Yuca. There’s absolutely no additional charge to you. I only recommend products that I’ve personally tried, use in my own kitchen, and believe are high quality products. Thank you so much for supporting Crazy For Yuca’s efforts to bring you the latest yuca/cassava recipes!


***


Yellow banner with black writing inviting readers to subscribe to CrazyForYuca.com


***


Check out these other great gluten-free latke recipes that use either yuca/cassava or cassava flour!

Root Veggie Latkes: a combination of sweet potato, parsnips, beets & cassava flour by AmyMyersMD.com

Best Latke Recipe: made with a combination of potatoes and cassava flour by EverydayMaven.com

Sweet Potato Latkes: a combination of potatoes, sweet potatoes, & cassava flour by ZenBelly.com


Disclaimer– At Crazy for Yuca I write about my own personal health and diet journey.  My experience and recipes are not to be considered expert advice or suggestive that anyone follow any particular diet protocol. Each person’s body and medical issues are individual and need to be evaluated by a medical professional. If you have any concerns due to your specific diagnoses, please consult your doctor before eating yuca.


CrazyForYuca.com logo with red heart and yellow lettering.

Chocolate Chip Peppermint Brownies (Grain-Free, Gluten-Free, Dairy-Free!)

Chocolate Chip Peppermint Brownies (Grain-Free, Gluten-Free, Dairy-Free!)

    Looking for a scrumptious, fudgy, brownie recipe? Look no further! These Chocolate Chip Peppermint Brownies are not only AWESOME, they’re gluten, grain, dairy, and soy-free! The peppermint adds an extra holiday feel, but these can be made any time of year! Not a 

Apple Cassava Crumble

Apple Cassava Crumble

Nothing says Fall like the smell of apples and cinnamon! And there’s nothing cozier than snuggling up with a baked apple crumble on a chilly day! This Apple Cassava Crumble is so quick and easy to make! Perfect for your next brunch, snack, dessert for Thanksgiving 

Cassava Flour Fresh Pasta (Paleo, Nut Free)

Cassava Flour Fresh Pasta (Paleo, Nut Free)

Cassava Flour Fresh Pasta cut into fettuccine in piles on wooden cutting board.
Pasta made from cassava flour! Dreams really do come true!!! I couldn’t be more excited to add this homemade Cassava Flour Fresh Pasta to my yuca/cassava repertoire! I’ve been meaning to create a pasta recipe, but I’ve been too caught up in all my other ideas lately! (Yuca recipe possibilities are truly endless!!!) When I came across a ravioli post by Hayley from “Health Starts In The Kitchen” on Instagram, I was compelled to try her Cassava Flour Pasta Dough recipe that very night! It was so perfectly scrumptious that I no longer feel the need to create my own! (Why recreate the wheel?) I’m just going to make her recipe from now on, and show you step by step pictures below of just how easy it is to make! I’m sure you’ll LOVE it as much as I do! See link below for Hayley’s recipe.

Have you ever had fresh pasta? It’s a real treat! Why eat processed pasta made from enriched flours when this incredible, gluten, grain, and nut-free, whole-food pasta is so quick and easy to make??? The possibilities of what can be made with this pasta dough are endless!!! I made mine into fettuccine this time, but this basic dough recipe can be used in any pasta dish!

This fresh pasta is made with Otto’s Cassava Flour – Get it by clicking here.A bag of Otto's Cassava Flour

 Click any non-perishable ingredient listed below to order if needed.

Ingredients:

Otto’s Cassava flour

pink Himalayan salt  (I use this type because of its high mineral content)

– pastured eggs

avocado oil (I use Chosen Foods 100% Pure Avocado Oil)

organic chicken bone broth or filtered water. (I use Pacific Foods Organic Chicken Bone Broth since I did’t have fresh bone broth on hand.)

-parchment paper (My preferred method of rolling out dough to prevent sticking to counter or rolling pin.)

-plastic wrap

Let’s make Homemade Grain-Free Pasta!

Blend ingredients into a dough (I simply mixed with a spoon, then kneaded dough with my hands.)

Wrap in plastic wrap and let sit for a few minutes.

A ball of Cassava Flour Fresh Pasta in plastic wrap.

Using a rolling pin, roll out pasta dough between 2 pieces of parchment paper to preferred thickness.

Cut into strips using a pizza cutter and straight edge. I chose to make fettuccine, but any desired shape can be made!

Rolled out Cassava Flour Fresh Pasta dough being cut into strips with pizza cutter

Place freshly cut pasta into pot of boiling water for about 5 minutes.

Check out this little video of my fettuccine boiling. (I was literally drooling in anticipation of trying it! It didn’t disappoint!!!)

Video – Homemade Grain-Free Pasta boiling

Cassava Flour Fresh Pasta fettuccine boiling in large pot

Drain Grain-Free Pasta in colander. 
Cassava Flour Fresh Pasta fettuccine draining in colander

Serve immediately as part of your favorite pasta recipe!

How simple and easy was that?!?!

*For Hayley’s full recipe click here: 

Cassava Flour Pasta Dough – Health Starts in the Kitchen

What will you make with your Homemade Grain-Free Pasta dough???

Maybe some fun shaped pasta? Ravioli? Lasagna? Add it to your favorite soup or stew???

Don’t forget to take a picture of your creation and share with me on Instagram!

Comment below to tell me what you think of this recipe!

Cassava Flour Fresh Pasta with sautéed veggies! Here, I topped the fettuccine with sautéed onions, garlic, zucchini, red pepper, and red chard. I then topped it with a little sauce made with bone broth and Primal Palate Adobo Seasoning. YUM!!!

Cassava Flour Fresh Pasta with sautéed vegetables in white bowl with black background.

Check out Primal Palate’s amazing seasonings and blends by clicking here.Three Primal Palate Signature Blends including Meat & Potato Seasoning, Adobo Seasoning, and Barbecue Rub

Here I added chicken from my Easy Go-To Crockpot Chicken that’s always in my fridge, ready to be thrown into any recipe!

Cassava Flour Fresh Pasta fettuccini with sautéed vegetables and chicken in white bowl.

To test out if this pasta stayed fresh, I used the leftovers the next night to add to my chicken cacciatore with spinach! Pasta perfection!

Cassava Flour Fresh Pasta fettuccine with chicken cacciatore and spinach in white bowl.

Chicken Soup with Cassava Fresh Pasta!!! 😃


***

Black banner with red and white writing inviting readers to comment below and share their pictures on @CrazyForYuca on Instagram

***

CLICK HERE TO SHOP

FOR YUCA CHIPS

AND FOR PANTRY ITEMS & KITCHEN GADGETS I PERSONALLY USE TO MAKE CRAZY FOR YUCA RECIPES!

Siete, Plant Wise, Artisan Tropics, and Jan's yuca / cassava chips.

By ordering recommended products through our website we get a small percentage of the sale which helps to support the maintenance of Crazy For Yuca. There’s absolutely no additional charge to you. I only recommend products that I’ve personally tried, use in my own kitchen, and believe are high quality products. Thank you so much for supporting Crazy For Yuca’s efforts to bring you the latest yuca/cassava recipes!

***

Yellow banner with black writing inviting readers to subscribe to CrazyForYuca.com

Check out these links to other great cassava flour pasta recipes!!! 

PALEO PASTA NOODLES {NUT FREE} by Jennifer from Predominantly Paleo

Homemade Paleo Pasta (Grain Free, Gluten Free, Nut Free) by Natalie from THE CASTAWAY KITCHEN

HOMEMADE CASSAVA FLOUR PASTA {NO PASTA-MAKER NEEDED!} by Cristina from Honey Ghee And Me


Disclaimer– At Crazy for Yuca I write about my own personal health and diet journey.  My experience and recipes are not to be considered expert advice or suggestive that anyone follow any particular diet protocol. Each person’s body and medical issues are individual and need to be evaluated by a medical professional. If you have any concerns due to your specific diagnoses, please consult your doctor before eating yuca.

CrazyForYuca.com logo with red heart and yellow lettering.

Baked Stuffed Yuca (Gluten-Free, Dairy-Free, Vegan option)

Baked Stuffed Yuca (Gluten-Free, Dairy-Free, Vegan option)

I like to think of Baked Stuffed Yuca as healthy stromboli – an Italian inspired gluten and grain-free yuca dough rolled around all “real food” nutritious ingredients! They can be made vegan by filling them with only veggies. I filled these with organic grass-fed beef, 

Gluten-Free Baguettes

Gluten-Free Baguettes

These baguettes are AMAZING! You’d never guess they’re gluten-free! And they’re super simple to make! Perfectly crispy on the outside and soft and airy on the inside – just like good bread should be! I had to make it for myself after watching Jules Shepard 

Chocolate SunButter Pinwheel Cookies (Gluten-Free, Dairy-Free, Nut-Free)

Chocolate SunButter Pinwheel Cookies (Gluten-Free, Dairy-Free, Nut-Free)

3 Chocolate SunButter Pinwheel Cookies on white plate on red and white striped cloth

Everything is awesome with chocolate – am I right??? These Chocolate SunButter Pinwheel Cookies are a variation of my Strawberry Almond Butter Pinwheel Cookies (which are great even without chocolate!) Not only is this variation gluten, grain, dairy, and soy-free, but can be made nut-free as well! These Pinwheel Cookies are made with Pascha Chocolate, a brand known for their high quality, allergen-free chocolate, and SunButter, which is simply sunflower seeds pulverized into a creamy spread. Rolled into a “pinwheel” design, then topped with roasted sunflower seeds (or nuts,) these cookies are not only scrumptious, they’re full of healthy, “real food” ingredients! Fun, delicious, and a gorgeous treat to serve for your next brunch, or as a dessert any time!

*Any nut butter can be used instead of SunButter if nuts are preferred and tolerated.

Plate full of Chocolate SunButter Cookies.

Let’s make Chocolate SunButter Pinwheel Cookies

*Printer-friendly recipe below*

Click on any needed non-perishable ingredient listed below to order online:

Ingredients for cassava flour dough:

-1 1/2 cups Otto’s Cassava Flour

-2 tablespoons organic 100% maple syrup

-1 organic, cage-free egg (I use duck eggs since I’m sensitive to chicken eggs, but either can be used.)

-1/2 teaspoon baking soda (I use Bob’s Red Mill)

-1/2 teaspoon xanthan gum (I use Bob’s Red Mill.)

-1 teaspoon pink Himalayan salt

-1/2 cup Spectrum Organic Vegetable Shortening

-1/2 cup filtered water

parchment paper

I use Otto’s Cassava Flour for all of my grain-free baking!

It’s available in small specialty markets or online here.

Otto’s Naturals 100% Natural Cassava Flour Made from Yuca Root Bag, 2 Pound
Bag of Otto's Cassava Flour

What makes this crust so flakey and delicious?

Spectrum Organic Vegetable Shortening. Click picture below to check it out:


Spectrum Organic Vegetable Shortening.

Ingredients for filling:

-1/2 cup Organic SunButter (a nut-free, creamy spread made from pulverized sunflower seeds.) *Almond or peanut butter can also be used if nuts are tolerated.

-1/4 cup sunflower seeds. (I use Trader Joe’s Roasted, Unsalted Sunflower Seeds.)

-1 teaspoon cinnamon – divided (I use Primal Palate Cinnamon.)

-1/2 cup melted chocolate. (I use Pascha Organic Dark Chocolate Baking Chips – either 55% cacao or 85% depending on the palate of my audience.) The higher the cacao, the less sweet the cookie. 55% is most typical of the sweetness of the average chocolate chip. Pascha chocolate chips even come in 100% cacao!

Pascha Organic Allergen-Free Dark Chocolate Chips – 55%, 85% and 100% Cacao

Bag of Pascha Organic Dark Chocolate Chips 55% Cacao Semi-Sweet.

Pascha Organic Dark Chocolate Chips 85% Cacao Semi-Sweet. Pascha Organic Dark Chocolate Chips 100% Cacao Semi-Sweet.

Topping ingredients:

-1 organic cage-free egg (for an egg wash.) Whisk, then brush over rolled-up cookies to give them a golden color when baked.

-1/4 cup sunflower seeds  (I use Trader Joe’s Roasted, Unsalted Sunflower Seeds.)

-1/4 teaspoon cinnamon (I use Primal Palate Cinnamon.)

Click below to explore Primal Palate Organic Cinnamon and other amazing seasoningsPrimal Palate Organic Seasoning

Five Chocolate SunButter Pinwheel Cookies spiral side up on white plate.

To make cassava flour dough: In a large bowl, blend Otto’s Cassava Flour, baking soda, xantham gum, and salt. In a second bowl, whisk egg, then add organic maple syrup and water. Combine contents of the two bowls. Add Spectrum Organic Vegetable Shortening and blend until a dough is formed. Once mixing with a spoon becomes too difficult, use hands to fully incorporate ingredients. (A stand mixer can also be used.)

A cassava flour dough ball using Otto's Cassava Flour.

Making dough into Pinwheel Cookies: Divide dough into 2 equal balls. Roll out each dough ball between 2 pieces of parchment paper to form the base of the Pinwheel Cookies.

Rolled out dough between 2 pieces of parchment paper.

Spread half of the Organic SunButter (1/4 cup) on top of each piece of rolled-out dough, leaving a 1/2 inch plain edge along one side. (This will prevent filling from overflowing over the top of the pastry when being rolled up.)

Place half of the melted chocolate (1/4 cup) directly on top of the Sunbutter for each of the two rolled-out pieces of dough.

Spreading SunButter and melted Pascha Organic Dark Chocolate chips onto rolled out dough.

Sprinkle each rolled-out dough with half of the cinnamon, and half the roasted sunflower seeds (or nuts.)

Starting with the end where the SunButter and chocolate were spread right up to the edge, tightly roll dough from one end to the other like a jelly roll. I find it helpful to lift parchment paper to guide the dough. *Make sure to roll up your pinwheel cookies before allowing the chocolate to dry and become stiff.

Rolling up Chocolate SunButter Pinwheel Cookies.

Ensure that pinwheel log is rolled-up as tight as possible (no air within the log.)

Tightly roll Chocolate SunButter Pinwheel Cookie log

Wrap Chocolate SunButter Pinwheel Cookie logs tightly in either parchment or plastic wrap and place in freezer for one hour. (I prefer using the same parchment I just used to roll out dough. This prevents waste as well as provides a non-toxic wrap for my logs as compared to plastic wrap.) Placing Pinwheel logs into the freezer is needed to firm up ingredients so they will hold their shape during slicing into individual cookies. This will enable the creation of the pinwheel design. If sliced at room temperature, layers blend together during slicing. If frozen for longer than 1 hour, dough becomes brittle and crumby during slicing. If this occurs, simply leave log out on the counter for a few minutes before continuing to slice.

Chocolate SunButter Pinwheel Cookie log wrapped in parchment paper.

Remove logs from freezer, unwrap and place on cutting board. Use a sharp knife to slice each log into 12 Chocolate SunButter Pinwheel Cookies. Test readiness for slicing by starting at one end (since each end is unlikely to form a perfect pinwheel design.) It’s the proper temperature for slicing when a sharp knife easily slices through log without the dough crumbling or log losing its shape.

Slicing Chocolate SunButter Pinwheel cookie logs

Place Pinwheel Cookies onto a cookie sheet lined with parchment paper. (The same piece of parchment can be wiped clean and re-used.)

Unbaked Chocolate SunButter Pinwheel Cookies on cookie sheet lined with parchment.

Whisk an egg and brush top of each cookie with egg wash. Sprinkle with cinnamon and top with sunflower seeds.

Lay each cookie down, pinwheel design facing up (and down) during baking.

Place in a preheated oven and bake at 350 degrees for 20-25 minutes, until edges begin to brown.

Enjoy as a delectable dessert or as a pastry at your next brunch!

Baked Chocolate SunButter Pinwheel Cookies.

These Chocolate SunButter Pinwheel Cookies freeze well – to be honest my husband and I love eating them right out of the freezer – FROZEN!

Chocolate SunButter Pinwheel Cookies in a basket on red cloth.

By ordering recommended products through our website we get a small percentage of the sale which helps to support the maintenance of Crazy For Yuca. There’s absolutely no additional charge to you, and shipping is always free. Thank you so much for supporting our efforts to bring you the latest yuca/cassava recipes!

5 from 1 vote
Chocolate SunButter Pinwheel Cookies
Prep Time
1 hr 30 mins
Cook Time
25 mins
Total Time
1 hr 55 mins
 

Everything is awesome with chocolate - am I right??? These Chocolate SunButter Pinwheel Cookies are a variation of my Strawberry Almond Butter Pinwheel Cookies (which are great even without chocolate!) Not only is this variation gluten, grain, dairy, and soy-free, but can be made nut-free as well! They're made with Pascha Chocolate, a brand known for their high quality, allergen-free chocolate, and SunButter, which is simply sunflower seeds pulverized into a creamy spread. (Any nut butter can also be used if nuts are tolerated.) Rolled into a "pinwheel" design, then topped with roasted sunflower seeds (or nuts,) these cookies are not only scrumptious, they're full of healthy, "real food" ingredients! Fun, delicious, and a gorgeous treat to serve for your next brunch, or as a dessert any time!

Course: brunch, Dessert, Snack
Cuisine: dairy-free, gluten-free, grain-free, nut-free, soy-free
Keyword: cookie
Servings: 24
Author: Lauren from Crazy For Yuca
Ingredients
Ingredients for cassava flour dough:
  • 1 1/2 cups Otto's Cassava Flour
  • 2 tablespoons organic 100% maple syrup
  • 1 organic cage-free egg (I use duck eggs since I'm sensitive to chicken eggs, but either can be used.)
  • 1/2 teaspoon baking soda (I use Bob's Red Mill)
  • 1/2 teaspoon xantham gum (I use Bob's Red Mill)
  • 1 teaspoon pink Himalayan salt
  • 1/2 cup Spectrum Organic Vegetable Shortening
  • 1/2 cup filtered water
  • parchment paper
Ingredients for filling:
  • 1/2 cup Organic SunButter - divided (a nut-free, creamy spread made from pulverized sunflower seeds. *Almond or peanut butter can also be used if nuts are tolerated.)
  • 1/4 cup sunflower seeds - divided (I use Trader Joe's Roasted, Unsalted Sunflower Seeds.)
  • 1 teaspoon cinnamon - divided (I use Primal Palate Cinnamon.)
  • 1/2 cup melted chocolate - divided (I use Pascha Organic Dark Chocolate Baking Chips - either 55% cacao or 85% depending on the palate of my audience. The higher the cacao, the less sweet the cookie.)
Topping ingredients:
  • 1 organic cage-free egg (for an egg wash. Whisk, then brush over rolled-up cookies to give them a golden color when baked.)
  • 1/4 cup sunflower seeds (I use Trader Joe's Roasted, Unsalted Sunflower Seeds.)
  • 1/4 teaspoon cinnamon (I use Primal Palate Cinnamon.)
Instructions
To make cassava flour dough:
  1. In a large bowl, blend Otto's Cassava Flour, baking soda, xanthan gum, and salt. 

  2. In a second bowl, whisk egg, then add organic maple syrup and water.

  3. Combine contents of the two bowls, then add Spectrum Organic Vegetable Shortening. Blend until a dough is formed. (Once mixing with a spoon becomes too difficult, use hands to fully incorporate ingredients. A stand mixer can also be used.)

Making Dough into Pinwheel Cookies:
  1. Divide dough into 2 equal balls. Roll out each dough ball between 2 pieces of parchment paper to form the base of the Pinwheel Cookies.

  2. Spread half of the Organic SunButter (1/4 cup) on top of each piece of rolled-out dough, leaving a 1/2 inch plain edge along one side. (This will prevent filling from overflowing over the top of the pastry when being rolled up.)

  3. Place half of the melted chocolate (1/4 cup) directly on top of the Sunbutter for each of the two rolled-out pieces of dough.

  4. Sprinkle each rolled-out dough with half of the cinnamon, and half the roasted sunflower seeds (or nuts.)

  5. Starting with the end where the SunButter and chocolate were spread right up to the edge, tightly roll dough from one end to the other like a jelly roll. I find it helpful to lift parchment paper to guide the dough. 

    Note: Make sure to roll up your pinwheel cookies before allowing the chocolate to dry and become stiff. Ensure that pinwheel log is rolled-up as tight as possible (no air within the log.)

  6. Wrap Chocolate SunButter Pinwheel Cookie logs tightly in either parchment or plastic wrap and place in freezer for one hour. 

  7. Remove logs from freezer, unwrap and place on cutting board. Use a sharp knife to slice each log into 12 Chocolate SunButter Pinwheel Cookies. Test readiness for slicing by starting at one end (since each end is unlikely to form a perfect pinwheel design.) It's the proper temperature for slicing when a sharp knife easily slices through log without the dough crumbling or log losing its shape.

  8. Place Pinwheel Cookies onto a cookie sheet lined with parchment paper. 

  9. Whisk an egg and brush top of each cookie with egg wash. Sprinkle with cinnamon and top with sunflower seeds.

  10. Lay each cookie down, pinwheel design facing up (and down) during baking.

  11. Place in a preheated oven and bake at 350 degrees for 20-25 minutes, until edges begin to brown.

  12. Enjoy as a delectable dessert or as a pastry at your next brunch!

Disclaimer– At Crazy for Yuca I write about my own personal health and diet journey.  My experience and recipes are not to be considered expert advice or suggestive that anyone follow any particular diet protocol.  Each person’s body and medical issues are individual and need to be evaluated by a medical professional.  If you have any concerns due to your specific diagnoses, please consult your doctor before eating yuca.

Yuca Mash (GF, Paleo, Vegan, AIP, Whole30)

Yuca Mash (GF, Paleo, Vegan, AIP, Whole30)

Creamy, whipped Yuca Mash! Simple, healthy, and made with all “real food” ingredients!!! What can be better than that? Oh, maybe that it’s Paleo, low glycemic, non-GMO, non-inflammatory, as well as Whole30 and autoimmune protocol approved!! Not sure what yuca is??? It’s a root vegetable, 

Paleo Nut and Seed Bars

Paleo Nut and Seed Bars

What do you get when you take cassava flour and a bunch of nuts and seeds? Delicious, nutritious Paleo Nut and Seed Bars!!!! These bars have just enough sweetness, without being overly sweet. Cassava flour is a low-glycemic, non-inflammatory starch, while nuts and seeds provide 

Oven Baked S’mores Bars (Gluten-Free, Dairy-Free, Grain-Free)

Oven Baked S’mores Bars (Gluten-Free, Dairy-Free, Grain-Free)

Four Oven Baked S'mores Bars - Gluten-Free, Grain-Free, Dairy-Free on brown cloth with scattered marshmallows and chocolate chunks.

Bring the campfire home with Oven Baked S’mores Bars! These were created as a surprise birthday “cake” for my daughter who is gluten and dairy-free! She isn’t a fan of typical cake so I wanted to come up with something special. (Mission accomplished!!!) Years ago, my daughters both loved making a dessert called S’mores Brownies. It consisted of a brownie bottom with melted marshmallows on top. I took that inspiration and set out to make a delicious, grain-free, graham cracker-like cookie crust using Otto’s Cassava Flour and all “real food” ingredients. This delectable cookie crust is then topped with dark chocolate bars, then a jumble of mini marshmallows, chocolate chunks, and crumbled cookie crust! Once heated, the toasted marshmallows, melted chocolate, and cookie crust meld perfectly together! 😍 Total heaven!!! 🙌🏻

From the look on my daughter’s face while eating it, and the number of times she thanked me profusely for making this, I think I knocked it out of the ballpark on this one!!! The whole family devoured it! Total crowd pleaser!!! 😀😀😀


Close-up Oven Baked S'mores Bars - GlutenDairy, and Grain-free.

I served this Oven Baked S’mores hot (which was AMAZING!!!!) and was later surprised to see that it was also awesome cool.  The marshmallows got all toasty, which made them a bit crispy on the outside and gooey on the inside!  Mixed with the melted chocolate and soft cookie base, it was truly dessert perfection!!!

Let’s make Oven Baked S’mores Bars!

*Printer-friendly version below*

Ingredients for the cassava flour cookie crusts:

-3 cups Otto’s Cassava Flour

-4 organic, cage-free eggs (I use duck eggs, but chicken eggs can also be used)

-1 1/3 cup organic coconut oil – melted

-2 cups organic maple syrup

-4 teaspoons pure vanilla extract

-1 tablespoon ground cinnamon

-2 teaspoons xantham gum

-1 teaspoon pink Himalayan salt

parchment paper (I prefer using parchment for toxin-free, non-stick baking, and easy clean up.)


Need Otto’s Cassava Flour? Click here to check it out!
Bag of Otto's Cassava Flour


Topping ingredients:

-6 Trader Joe’s 72% Cacao Dark Chocolate Bars (They come in packs of 3 at store, or buy online in bulk here.)3 pack of Trader Joe's 72% Cacao Dark Chocolate Bars.

-2 cups Dandies All Natural Mini Vanilla Marshmallows (Gluten-free, Vegan, Non-GMO, Kosher) Click here to order.

Dandies All Natural Mini Vanilla Marshmallows.

-1 cup Enjoy Life Semi -Sweet Mega Chunks (100% real chocolate, Gluten-Free, Dairy-Free, Non-GMO, Kosher, Nut-Free, Soy-Free) Click here to order. Bag of Enjoy Life Mega Chunks Semi-Sweet.

*Note: Most non-perishable ingredients for this recipe can be purchased online by clicking the pictures or ingredients listed above, or by clicking the shopping tab at the top of the page. 

By ordering recommended products through links on our website we get a small commission which helps to support the maintenance of Crazy For Yuca. There’s absolutely no additional charge to you. Thank you so much for supporting our efforts to bring you the latest yuca/cassava recipes! 


Instructions:

Preheat oven to 375 degrees.

In a large bowl, blend Otto’s Cassava Flour,  pink Himalayan salt, cinnamon, and xantham gum.

In a second bowl, blend maple syrup, melted coconut oil, eggs, and vanilla.

Add wet ingredients to dry ingredient bowl and mix until fully combined. It should be the consistency of cookie dough.

Line a 9×11 inch baking pan with parchment paper. (This step is optional, but allows for easy clean up, as well as non-toxic, non-stick baking without the need to grease the pan.) Choose a baking pan that’s deep enough to hold the 3/4″ crust as well as the toppings which will be added after baking.

Spoon 3/4 of dough into parchment lined pan (reserving 1/4 of dough to make a second, thinner crust) and press down so dough forms an even cookie crust about 3/4″ thick.


Dough pressed to bottom of pan to form cookie crust – before bakingUnbaked cookie crust for Oven Baked S'mores Bars - Gluten-Free, Grain-Free, Dairy-Free.


Bake at 375 degrees for 20-25 minutes until edges become slightly brown and a fork stuck into center comes out clean.

Baked cassava flour cookie crust. Notice bottom crust thickness – about 3/4″Baked cookie crust for Oven Baked S'mores Bars - Gluten, Dairy, and Grain-free.


Take the reserved 1/4 of the dough and place it into same sized, parchment lined pan, creating a second cookie crust that’s about 1/4″ thick (about the thickness of a graham cracker.) This cookie crust will later be broken into chunks and spread on top of the thicker crust along with chocolate chucks and marshmallows. If 2 equal sized pans aren’t available, bake the first crust, remove from pan, then bake second crust in the same pan.

Bake second, thinner cookie crust at 375 degrees for 10-12 minutes.

Here I’m holding up the baked, thinner cookie crust to display thickness. 

Close-up top, thin cookie crust layer of Oven Baked S'mores Bars - Gluten, Dairy, and Grain-free.


With baked bottom cookie crust on parchment inside the pan, break apart dark chocolate bars into pieces and spread them evenly over crust.

Break thinner crust into pieces.

Scatter mini marshmallows, Enjoy Life Mega Chunks, and cookie crust pieces all over bottom cookie crust and chocolate bar pieces.

Place back into oven and bake for about 10 minutes, until marshmallows slightly brown.

Remove from oven.

Eat immediately for an authentic melty, gooey S’mores experience, or allow to cool for more of a cookie bar/candy experience. Both options are scrumptious!!!!

Note: If needed, the cookie crusts can be made ahead and kept in the refrigerator for a few days until you’re ready to fully assemble and heat these Oven Baked S’mores Bars.


S’mores Cookie Bars just before going into the oven for the final bake!

Oven Baked S'mores Bars - Gluten, Dairy, and Grain-free just before baking.


Oven Baked S’mores – right out of the oven and ready to be cut into bars. 

Oven Baked S'mores Bars - Gluten, Dairy, and Grain-free right out of the oven.


Close-up on the melted chocolate oozing out of the crevices! Truly irresistible!!!

Close-up of chocolate dripping from crevices of Oven Baked S'mores Bars - Gluten, Dairy, and Grain-free.


Enjoy!!!

One Oven Baked S'mores Bar - Gluten, Dairy, and Grain-free on white plate.


One last bite! (I’m literally drooling thinking back to this moment!)

Close-up the last bite of an Oven Baked S'mores Bar - Gluten, Dairy, and Grain-free.


Black banner with red and white writing inviting readers to comment below and share their pictures of this recipe on instagram.


CLICK HERE TO SHOP

For yuca snacks, pantry items, and kitchen gadgets I personally use to make Crazy For Yuca recipes in my own kitchen.


Siete, Plant Wise, Artisan Tropics, and Jan's yuca / cassava chips.


Primal Palate Essential Spice Bundle.


Yellow banner with black writing inviting readers to subscribe to CrazyForYuca.com


Oven Baked S'mores Bars (Gluten-Free, Dairy-Free, Grain-Free)
Prep Time
15 mins
Cook Time
30 mins
Total Time
45 mins
 

Bring the campfire home with Oven Baked S'mores Bars! This graham cracker-like cookie crust is made with Otto's Cassava Flour and all "real food" ingredients. This delectable cookie crust is then topped with dark chocolate bars, a jumble of mini marshmallows, chocolate chunks, and more crumbled cookie crust! Once heated, the toasted marshmallows, melted chocolate, and cookie crust combine perfectly, creating a scrumtious taste sensation! A real crowd pleaser!!!

Course: Dessert, Snack
Cuisine: dairy-free, gluten-free, grain-free
Servings: 12 bars
Author: Lauren from Crazy For Yuca
Ingredients
Ingredients for the cassava flour cookie crusts:
  • 3 cups Otto's Cassava Flour
  • 4 organic cage-free eggs (I use duck eggs since I'm sensitive to chicken eggs, but either can be used)
  • 1 1/3 cup organic coconut oil - melted
  • 2 cups organic maple syrup
  • 3 teaspoons pure vanilla extract
  • 3 teaspoons ground cinnamon
  • 2 teaspoons xantham gum
  • 1 teaspoon pink Himalayan salt
  • parchment paper I prefer using parchment for easy clean up, toxin-free, non-stick baking.
Topping Ingredients
  • 6 Trader Joe's 72% Cacao Dark Chocolate Bars
  • 2 cups Dandies All Natural Mini Vanilla Marshmallows (Gluten-free, Vegan, Non-GMO, Kosher)
  • 1 cup Enjoy Life Semi -Sweet Mega Chunks (100% real chocolate, Gluten-free, Dairy-free, Non-GMO, Kosher, Nut-Free, Soy-Free)
Instructions
Instructions:
  1. Preheat oven to 375 degrees.
  2. In a large bowl, blend Otto's Cassava Flour,  pink Himalayan salt, cinnamon, and xantham gum.
  3. In a second bowl, blend maple syrup, melted coconut oil, eggs, and vanilla.
  4. Add wet ingredients to dry ingredient bowl and mix until fully combined. It should be the consistency of cookie dough.
  5. Line a 9x11 inch baking pan with parchment paper. (This step is optional, but allows for easy clean up, and non-toxic, non-stick baking without the need to grease the pan.) Choose a baking pan that is deep enough to hold the 3/4" crust as well as the toppings which will be added later.

  6. Spoon 3/4 of dough into parchment lined pan and press down so dough forms an even cookie crust about 3/4" thick. (I use my hands for this.)

  7. Bake at 375 degrees for 20-25 minutes until edges become slightly brown and a fork stuck into center comes out clean.

  8. Take the reserved 1/4 of the dough and place it into same sized pan, creating a second cookie crust that's about 1/4" thick (about the thickness of a graham cracker.) This cookie crust will later be broken into chunks and spread on top of the thicker crust along with the chocolate and marshmallows. If 2 equal sized pans are not available, bake the first crust, remove from pan, then bake second crust in same pan.

  9. Bake second, thinner cookie crust at 375 degrees for 10-12 minutes.

  10. With the bottom cookie crust and parchment inside pan, break dark chocolate bars into pieces and spread them evenly over crust. 

  11. Break thinner crust into pieces and set aside.

  12. Scatter mini marshmallows, Enjoy Life Mega Chunks, and cookie crust pieces all over bottom cookie crust and chocolate bar pieces.

  13. Place back into oven and bake for about 10 minutes, until marshmallows slightly brown.

  14. Remove from oven.

  15. Eat immediately for an authentic melty, gooey S'mores experience, or allow to cool for more a cookie bar/candy experience!

  16. Enjoy!!!


Not an Amazon Prime member yet?

Try it free for 30 days by clicking here!


Disclaimer– In Crazy for Yuca I write about my own personal health and diet journey.  My experience and recipes are not to be considered expert advice or suggestive that anyone follow any particular diet protocol.  Each person’s body and medical issues are individual and need to be evaluated by a medical professional.  If you have any concerns due to your specific diagnoses, please consult your doctor before eating yuca.

Heart-shaped Crazy For Yuca logo


Yuca Chip Chat!

Yuca Chip Chat!

Have you tried Yuca Chips yet??? If not, maybe this post will inspire you. They’re crispy, crunchy, and DELICIOUS! While my Perfect Yuca Chip recipe is AWESOME, you likely don’t have time to break out the mandolin every time you’d like a snack. And since 

Chocolate Hazelnut Butter

Chocolate Hazelnut Butter

If you’re a Nutella fan, but prefer a healthy version that’s free of dairy, refined sugar, soy, and processed inflammatory oils, this Chocolate Hazelnut Butter is for you! While the first ingredient of Nutella is sugar, with only 13% hazelnuts, the predominant ingredient in this 

Strawberry Short-Crepe Cream on top!  (Gluten and Dairy-Free!)

Strawberry Short-Crepe Cream on top! (Gluten and Dairy-Free!)

Strawberry Shorty-Crepe Cream on Top on white plate with red background.

What’s more fun than strawberry shortcake?… Strawberry Short-Crepe Cream on Top!!! This beautiful gluten, diary, and refined sugar-free dessert is made simply by layering Grain-Free Crepes, scrumptious homemade Strawberry Jam, organic fresh strawberries, and Coconut Cream! It’s the perfect dessert, brunch dish, or birthday cake for any healthy eater! So much fun to make and eat!!! While this Strawberry Short-Crepe Cream on Top is super low in sugar, it really satisfies one’s sweet tooth!

This post includes a great recipe for Strawberry Chia Seed Jam by Lexi from LexisCleanKitchen.com. Why buy prepared jellies or jams when homemade, low sugar jam is this simple to make? Thank you Lexi for this incredible, healthy recipe!

Strawberry Short-Crepe Cream on Top

   (*Printer-Friendly Recipe below*)

Crepe Ingredients: (makes six 8 inch crepes)

-1/2 cup tapioca flour – (I use Bob’s Red Mill Tapioca Flour)

-2 Tbsp Cassava Flour – (I use Otto’s Cassava Flour)

-4 organic, cage-free eggs (I use duck eggs since I’m sensitive to chicken eggs. Both work perfectly!)

-2 Tbsp coconut oil – melted (I use Nutiva Organic, Unrefined, Virgin Coconut Oil)

-1/2 tsp pure vanilla extract (I use Simply Organic Pure Vanilla Extract)

-2 Tbsp almond milk (Cow’s milk can be used if a dairy option is preferred.)

-1/4 tsp pink Himalayan salt (While any salt can be used, I use pink Himalayan salt because of its high mineral content.)


Strawberry Jam Ingredients:

-organic strawberries

-raw organic honey or maple syrup

-lemon juice

chia seeds (I use Trader Joe’s Organic Chia Seeds.)


*Check out Lexi’s super simple recipe by clicking here: Strawberry Chia Seed Jam. She also has variations for blueberry and mango! If you haven’t checked out LexisCleanKitchen.com yet, you’re in for a treat!!!


Coconut Cream Ingredients:

-1 13.5 oz can organic coconut cream – chilled in refrigerator overnight or at least 8 hours. (I use Trader Joe’s Organic Coconut Cream) If coconut cream is not available, 2 or 3 cans of full fat coconut milk can also be used. Use only the coconut cream solids. Save coconut milk for another use.

-1 tsp pure vanilla extract (Optional – adds great flavor, but will taint pure white color of cream) (I use  Simply Organic Pure Vanilla Extract)

-2 tsp coconut sugar (I use Nutiva Organic Coconut Sugar)


Don’t have all the ingredients needed to make your

Strawberry Short-Crepe Cream on Top?

Simply click on the ingredients listed in recipe above to be brought to that pantry item on Amazon. By purchasing products through our affiliate links we get a small commission which helps to support the maintenance of Crazy For Yuca at no additional cost to you. All recommended products are ones that meet my high standards for quality, and are used in my own kitchen. Thank you for supporting the efforts of CrazyForYuca.com to bring you the lastest yuca/cassava recipes when you shop online through our site!


Not an Amazon Prime member yet?

Try Amazon Prime free for 30 days and get free 2 day shipping!

Try Amazon Prime 30-Day Free Trial

***


Crepe Instructions:

  1. Place melted coconut oil into mixing bowl along with eggs, vanilla, and almond milk. Blend thoroughly.

  2. Add tapioca flour, cassava flour, and pink Himalayan salt. Blend until smooth.

    Grain-Free Crepe batter in bowl being spooned by ladle.


  3. Heat a frying pan on medium heat. (No need to use a non-stick pan or oil. These crepes will not stick to pan!)

  4. Pour batter, about 1/4 cup at a time, into ungreased, heated frying pan. In order to make thin, circle-shaped crepes, pour batter slowly into the center of pan and use the back of the spoon or ladle in a circular motion to spread the batter evenly. *Don’t be discouraged if the first crepe sticks to the pan or is irregularly shaped. That is typical until you get the hang of it.

    Grain-Free Crepe batter being spooned into heated frying pan.


  5. Cook on first side for about 1 minute, until batter solidifies.

    A Grain-Free Crepe cooking in frying pan.


    7.  Flip and cook for an additional 30-60 seconds. Crepes should be slightly browned.

    A Grain-Free Crepe cooking in pan.


  6. *Note: These crepes can be made ahead and placed in the refrigerator or freezer and later made into your Strawberry Short-Crepe Cream on Top. They can be quickly reheated from frozen in a toaster oven for 3-5 minutes, a microwave for 30-45 seconds, or by being left on counter to defrost.


Making Strawberry Chia Seed Jam

Recipe by Lexi of LexisCleanKitchen.com

*Find full recipe by clicking this link: Strawberry Chia Seed Jam*

Homemade Strawberry Chia Seed Jam


***

Need a quicker, ready-made option for the strawberry jam?

Check out St. Dalfour brand strawberry fruit spread by clicking the picture below. It’s made with all natural ingredients including strawberries, sweetened only with grape and date juice concentrates, fruit pectin, and lemon juice.

St. Dalfour, Preserves, Strawberry, 10 oz


Coconut Cream 

Coconut Cream is quick and easy to make. It’s an awesome option for Vegan and dairy-free eaters who enjoy a dollop of whipped cream on their desserts!


Coconut Cream Instructions:

  1. Chill coconut cream or full-fat coconut milk overnight (or for at least 8 hours.)
  2. Place mixing bowl and beaters into freezer about an hour before making coconut cream.

2 cans of Trader Joe's Organic Coconut Cream. One open showing coconut cream solids, the other closed.


3. Spoon coconut cream solids into chilled bowl (leaving behind any liquid coconut milk.)

4. Using an electric mixer with chilled beaters, gradually increase speed from low to high. Beat until peaks form. This takes about 3-4 minutes.

5. Add sugar and vanilla, and beat until fully combined. Whipping up Coconut Cream in silver bowl with electric mixer.


Putting together your Strawberry Short-Crepe Cream on Top!

1. Place one crepe on desired serving plate.

2. Spread jelly and cut-up organic strawberries on top of crepe.

3. Place a second crepe on top, and spread coconut cream and fresh strawberries on second crepe.

4. Alternate layers of crepes, strawberry jam, and coconut cream until you run out of crepes.

5. Top with additional strawberry jam, fresh strawberries, and a dollop of coconut cream.

Note: Use a very thin, sharp knife to cut into servings.

Enjoy!


Strawberry Short-Crepe Cream on Top on which plate.


***


CLICK HERE TO SHOP

for healthy pantry items, yuca snacks, and kitchen gadgets I personally use to make Crazy For Yuca recipes in my kitchen! 

Check out the yuca/cassava snacks in my Shopping Tab!

 All personally taste tested and approved by myself and my family! For a detailed description of recommended yuca/cassava chips, see my post The Perfect Yuca Chip!


***


Strawberry Short-Crepe Cream on Top (Gluten and Dairy-Free)
Prep Time
1 hr 30 mins
 

What's more fun than strawberry shortcake?... Strawberry Short-Crepe Cream on Top!!! This beautiful gluten, diary, and refined sugar-free dessert is made simply by layering Grain-Free Crepes, scrumptious homemade Strawberry Jam, organic fresh strawberries, and Coconut Cream! It's the perfect dessert, brunch dish, or birthday cake for any healthy eater! So much fun to make and eat!!! While this Strawberry Short-Crepe Cream on Top is super low in sugar, it really satisfies one's sweet tooth!

Course: brunch, Dessert
Keyword: crepe, strawberry shortcake
Servings: 6
Author: Lauren from Crazy For Yuca
Ingredients
Grain-Free Crepes Ingredients:
  • 1/2 cup tapioca flour
  • 2 Tbsp Otto's Cassava Flour
  • 4 eggs (I use duck eggs since I'm sensitive to chicken eggs, but both work perfectly!)
  • 2 Tbsp coconut oil - melted
  • 1/2 tsp pure vanilla extract
  • 2 Tbsp almond milk - (Cow's milk can be used if a dairy option is preferred.)
  • 1/4 tsp pink Himalayan salt - (While any salt can be used, I use pink Himalayan salt because of its high mineral content.)
Strawberry Chia Seed Jam Ingredients: (See link to LexisCleanKitchen Strawberry Jam post for complete recipe)
  • organic strawberries
  • lemon juice
  • chia seeds
  • raw organic honey or maple syrup
Coconut Cream Ingredients:
  • 1 can coconut cream - chilled in refrigerator overnight or at least 8 hours (or 2-3 cans full fat coconut milk)
  • 1 tsp pure vanilla extract
  • 2 tsp coconut sugar
Instructions
Grain-Free Crepe Instructions:
  1. Melt coconut oil.
  2. Place melted coconut oil into mixing bowl along with eggs, vanilla, and almond milk. Blend thoroughly.
  3. Add tapioca flour, cassava flour, and pink Himalayan salt. Blend until smooth.
  4. Heat a frying pan on medium heat. (No need to use a non-stick pan or oil. These crepes will not stick to pan!)
  5. Pour batter, about 1/4 cup at a time, into ungreased, heated frying pan. In order to make thin, circle-shaped crepes, pour batter slowly into the center of pan and use the back of the spoon or ladle in a circular motion to spread the batter evenly.
  6. Cook on first side for about 1 minute, until batter solidifies. Flip and cook for an additional 30-60 seconds. Crepes should be slightly browned.
  7. Eat immediately with desired toppings, or store crepes in the refrigerator or freezer for future use in an airtight bag or container. These crepes can be quickly reheated from frozen in a toaster oven for 3-5 minutes or microwave for 30-45 seconds.
See link to LexisCleanKitchen Strawberry Chia Seed Jam post above for complete recipe.)
Coconut Cream Instructions:
  1. Spoon coconut cream solids (not any liquid coconut milk) into chilled bowl.

  2. Using an electric mixer with chilled beaters, gradually increase speed to high, and beat until peaks form. This takes about 3-4 minutes.

  3. Add sugar and vanilla and beat until fully combined. 

Putting together your Strawberry Short-Crepe Cream On Top
  1. Place one crepe on desired serving plate.

  2. Spread jelly and cut-up organic strawberries on top of crepe.

  3. Place a second crepe on top, and spread coconut cream and fresh strawberries on second crepe.

  4. Alternate layers of crepes, strawberry jam, and coconut cream until you run out of crepes.

  5. Top with additional strawberry jam, fresh strawberries, and a dollop of coconut cream.

  6. Enjoy!

Recipe Notes

Note: Use a very thin, sharp knife to cut into servings.


Black banner with red and white writing inviting readers to comment below as well as share their crepe pictures on instagram.


Try AmazonFresh Free Trial 
***
Yellow banner with black writing inviting readers to subscribe to CrazyForYuca.com


***


Shop Amazon Warehouse Deals – Deep Discounts on Open-box and Used Kitchen Gadgets


***


Crazy For Yuca logs - red and yellow lettering with large red heart.


Disclaimer– In Crazy for Yuca I write about my own personal health and diet journey.  My experience and recipes are not to be considered expert advice or suggestive that anyone follow any particular diet protocol.  Each person’s body and medical issues are individual and need to be evaluated by a medical professional.  If you have any concerns due to your specific diagnoses, please consult your doctor before eating yuca.

Crazy For Yuca log - Red heart with yellow writing.

Grain-Free Crepes With Strawberry Jam

Grain-Free Crepes With Strawberry Jam

Grain-Free Crepes are quick and easy to prepare, and lots of fun to eat! They can be filled with almost anything – whether sweet or savory! With a fruit filling, such as strawberry jam, they’re perfect for entertaining guests for brunch, or as a sweet 

Lasagna (Gluten, Grain and Dairy-Free, Whole30, Paleo)

Lasagna (Gluten, Grain and Dairy-Free, Whole30, Paleo)

This guilt-free lasagna has everything that makes lasagna yummy, yet no gluten, grain, or dairy to trigger many common food sensitivities. It’s even Paleo and Whole30 compliant! Who ever thought one could say that about lasagna??? While it may be a bit unconventional, this lasagna 

Grain-Free Popovers

Grain-Free Popovers

These Grain-Free Popovers are so light and airy! They’re fun to eat and really hit the spot when you’re craving some bread, but don’t want the grain! They’re especially delicious warm right out of the oven! While most of my Crazy For Yuca recipes are made with either fresh or frozen yuca (a.k.a cassava) or cassava flour, the main ingredient of these popovers is Gluten Free Cake Meal, which is mostly potato starch and tapioca starch (also called tapioca flour.) Tapioca starch is actually made from yuca during the process of making cassava flour. While related, there are important differences.

Cassava flour is made by drying and grinding the whole cassava root, after extracting the starchy liquid from the cassava. Tapioca starch is what is left after all the water evaporates out of the starchy liquid that was extracted out of the cassava while making cassava flour. In sum, cassava flour is the ground whole root, and tapioca flour  is the starchy extract of the root that is made into flour. These popovers, therefore, don’t contain as much fiber as they would if they were made from cassava flour, but the consistency is much lighter.

These Grain-Free Popovers puff significantly while baking. They’re often partially hollow inside and can be cut in half and stuffed with your favorite filling! I love them warmed up with a little ghee (or butter before I cut out dairy,) or cut in half and filled with a Veggie Egg!

While originally created as a Passover muffin (since they’re made with Gluten Free Matzo Cake Meal,) these babies can be made any time of year and enjoyed whenever a roll or piece of bread would be served. They’re quick and easy to make. You can get Gluten-Free Cake Meal by clicking this link any time of year!

Manischewitz Gluten Free Cake Meal 16 oz. Can (2 Pack)
 

Grain-Free Popover Ingredients: (Full printer-friendly recipe below)

Gluten Free Cake Meal

avocado oil

pink Himalayan salt

coconut sugar

-cage-free eggs

-filtered water


Making Grain-Free Popovers

In a small saucepan, heat water and oil to a boil. Remove from heat and allow to cool. In a mixing bowl, blend Gluten-Free Cake Meal, salt, and sugar. Then add water and oil mixture to mixing bowl.

Grain-Free Popover dough before eggs are added in mixing bowl.


Beat eggs in separate bowl. Then pour into mixing bowl and thoroughly blend.

Grain-Free Popover batter in mixing bowl.


Coat muffin tins with thin layer of avocado oil to prevent sticking. (I use avocado oil because of its high smoke point. Avoid using oils that degrade at high temperatures, as this destroys the beneficial nutrients and phytochemicals in the oils and creates free radicals.)

Spoon batter evenly into each of 12 muffin cups.

Bake in preheated oven set to 375 degrees for 40 minutes.

Muffins are ready when they have puffed up and browned.

Four baked Grain-Free Popovers in muffin tin.

CLICK HERE TO SHOP

for ingredients to make Grain-Free Popovers, or to see recommended pantry items and kitchen gadgets I personally use to make Crazy For Yuca recipes! 

Check out the yuca/cassava snacks – all personally taste tested and approved by myself and my  family! For a detailed description of recommended yuca/cassava chips, see my post The Perfect Yuca Chip!


By ordering recommended products through our website we get a small percentage of the sale which helps to support the maintenance of Crazy For Yuca. There’s absolutely no additional cost to you. Thank you so much for supporting our efforts to bring you the latest yuca/cassava recipes!


Invitation to comment below or tag your photo of this recipe on instagram


***


Grain-Free Popovers
Prep Time
10 mins
Cook Time
40 mins
Total Time
40 mins
 

These Grain-Free Popovers are so light and airy! They're fun to eat and really hit the spot when you're craving some bread! They're especially delicious warm right out of the oven! They puff significantly while baking! They're often partially hollow inside and can be cut in half and stuffed with your favorite filling! While originally created as a Passover muffin (since they're made with Gluten Free Matzo Cake Meal,) these babies can be made any time of year and enjoyed whenever a roll or piece of bread would be served.

Course: brunch, Snack
Servings: 12 muffins
Author: Lauren from Crazy For Yuca
Ingredients
  • 1 cup Gluten-Free Cake Meal
  • 1/3 cup avocado oil
  • 4 cage-free eggs
  • 1 tablespoon coconut sugar
  • 1/2 teaspoon pink Himalayan salt (I use pink Himalayan salt for all cooking and baking because of its high mineral content.
  • 1 cup filtered water
Instructions
  1. In a small saucepan, heat water and oil to a boil. Then remove from heat and allow to cool.

  2. In a mixing bowl, blend Gluten-Free Cake Meal, salt, and sugar.

  3. In a mixing bowl, blend Gluten-Free Cake Meal, salt, and sugar. Then add water and oil mixture to mixing bowl. 

  4. Beat eggs in separate bowl. Then pour into mixing bowl and thoroughly blend. 

  5. Coat muffin tins with thin layer of avocado oil to prevent sticking.

  6. Spoon batter evenly into each of 12 muffin cups.

  7. Bake in preheated oven set to 375 degrees for 40 minutes.  

  8. Muffins are ready when they have puffed up and browned. Enjoy!


***


Invitation to subscribe to CrazyForYuca.com.


Disclaimer– In Crazy for Yuca I write about my own personal health and diet journey.  My experience and recipes are not to be considered expert advice or suggestive that anyone follow any particular diet protocol. Each person’s body and medical issues are individual and need to be evaluated by a medical professional.  If you have any concerns due to your specific diagnoses, please consult your doctor before eating yuca.

Logo - Red heart with yellow writing saying "Crazy For Yuca"


Easter Egg Hand Pies (Gluten and Dairy-Free!)

Easter Egg Hand Pies (Gluten and Dairy-Free!)

Nothing says Easter like decorated eggs! And nothing says “fun celebration” like hand pies!!! Did you love Pop-tarts as a kid? If the answer is “yes”, you’ll adore these Easter Egg Hand Pies – with a delectable flakey crust on the outside, and sweet fruit 

Grain-Free Mandel Bread / Biscotti (Kosher for Passover / Otto’s Cassava Flour)

Grain-Free Mandel Bread / Biscotti (Kosher for Passover / Otto’s Cassava Flour)

I call this recipe Mandel Bread / Biscotti because there’s little (if any) difference between these 2 cookies. I want everyone to feel free to enjoy them – no matter one’s heritage, or holiday celebrating. With both Passover and Easter coming within the next week, 

Grain-Free Cassava Flour Matzo Balls

Grain-Free Cassava Flour Matzo Balls

2 Cassava Flour Matzo Balls and soup in Lenox bowl with carrots.

It’s time to plan your Passover menu! Why not decrease the grains this holiday with Grain-Free Cassava Flour Matzo Balls? They will be adored by your gluten-eating and gluten-free guests alike! (I had a little trouble stopping myself from eating them all before getting a good blog photo! I just LOVE these!!!) I created a few versions for my family to taste test, and they unanimously agreed that this recipe is the best!

These Grain-Free Matzo Balls have an authentic matzo ball taste (you’ll never miss the matzo,) with a bit more flavor than typical bland Passover matzo balls. This extra pop of flavor comes from the addition of Trader Joe’s Onion Salt and minced scallions, which complement the soup perfectly!

These Grain-Free Cassava Flour Matzo Balls are a bit more dense in the center (not as fluffy) as some matzo balls, which is actually how I’ve always preferred them. The addition of 2 tablespoons of seltzer creates a nice moistness throughout. Passover perfection!!!

For more information about cassava flour see: Getting to Know Cassava (Yuca) Flour.


Making Grain-Free Cassava Flour Matzo Balls

(Makes 10-12 matzo balls) 

Ingredients: (Full printer friendly recipe below)

-3/4 cups Otto’s Cassava Flour 

-3 cage-free eggs (I use duck eggs since I’m sensitive to chicken eggs. Both work perfectly!)

-1/2 teaspoon Trader Joe’s Onion Salt

-1 teaspoon pink Himalayan salt

-1 teaspoon scallions or chives – minced

-1 tablespoon avocado oil (I use Chosen Foods 100% Pure Avocado Oil.)

-2 tablespoons seltzer (Cassava flour matzo balls can be a bit denser than those made from wheat. Seltzer helps them to be more moist and fluffy.)


Click here to shop for any needed non-perishable ingredients to make these scrumptious matzo balls such as:


Otto’s Naturals 100% Natural Cassava Flour Made from Yuca Root Bag, 2 Pound
Trader Jo’e Onion Salt Savory Allium blend Seasoning Salt 2 Oz.
Chosen Foods 100% Pure Hand-crafted Avocado Oil (33.8-oz Bottle) Pack of 2
 

Natierra, Himalania Fine Grain Himalayan Pink Salt Shaker, 13 Ounce
 

By ordering recommended products through our website we get a small percentage of the sale which helps to support the maintenance of Crazy For Yuca. There’s absolutely no additional cost to you. Thank you so much for supporting our efforts to bring you the latest yuca/cassava recipes!


***


Directions:

Step 1: Bring a large pot of water to a boil.

Step 2: In a large bowl, blend all ingredients including Otto’s Cassava Flour, eggs, pink Himalayan salt, Trader Joe’s Onion Salt, avocado oil, seltzer, and minced scallions or chives.

Grain-Free Cassava Flour dough in metal bowl.


Step 3: Moisten hands and scoop up enough dough to make a 1 inch ball. Roll dough between hands like a meatball, and place into pot of boiling water. Repeat to make 10-12 matzo balls. (Balls with expand during cooking.)

Step 4: Return water to a boil, then reduce heat and cover pot. Simmer for 15 minutes.

Grain-Free Cassava Flour Matzo Balls cooking in pot


Step 5: Remove from water and add to your favorite chicken soup. Enjoy! (Or eat plain with your fingers immediately, because they’re just that good!!!)


Grain-Free Cassava Flour Matzo Balls in chicken soup plated in china bowl.


***

An invitation to comment below or tag a picture of your yuca recipe on Instagram @CrazyForYuca

***


Grain-Free Cassava Flour Matzo Balls
Prep Time
15 mins
Cook Time
15 mins
Total Time
30 mins
 

Why not decrease the grains this holiday with Grain-Free Cassava Flour Matzo Balls? They will be adored by your gluten-eating and gluten-free guests alike! These Grain-Free Matzo Balls have an authentic matzo ball taste (you'll never miss the matzo,) with a bit more flavor than typical bland Passover matzo balls. This extra pop of flavor comes from the addition of Trader Joe's Onion Salt and minced scallions which complement the soup perfectly! They are a bit more dense in the center (not as fluffy) as some matzo balls, which is actually how I've always preferred them. The addition of 2 tablespoons of seltzer creates a nice moistness throughout. Passover perfection!!!

Course: Soup
Servings: 10 Matzo Balls
Author: Lauren from Crazy For Yuca
Ingredients
  • 3/4 cup Otto's Cassava Flour
  • 3 cage-free eggs
  • 1 tablespoon avocado oil
  • 2 tablespoons seltzer
  • 1 teaspoon pink Himalayan salt
  • 1 tablespoon scallions or chives - minced
  • 1/2 teaspoon Trader Joe's Onion Salt
Instructions
  1. Bring a large pot of water to a boil.

  2. Meanwhile, place all ingredients into a large bowl, including cassava flour, eggs, avocado oil, seltzer, salt, Trader Joe's onion salt, and minced scallions (or chives) and blend thoroughly.

  3. Moisten hands and scoop up a small amount of dough (enough to make 1" balls.) Roll dough between hands like a meatball. (If balls stick excessively to hands, moisten them again before rolling the next matzo ball.) 

  4. Place matzo balls directly into boiling water. They will expand while cooking.

  5. Return to a boil. Then cover pot, reduce heat, and simmer for 15 minutes.

  6. Remove cooked matzo balls from pot. Place into your favorite chicken soup. Enjoy!


A yellow banner with an invitation to subscribe to CrazyForYuca.com.


Disclaimer– In Crazy for Yuca I write about my own personal health and diet journey.  My experience and recipes are not to be considered expert advice or suggestive that anyone follow any particular diet protocol.  Each person’s body and medical issues are individual and need to be evaluated by a medical professional.  If you have any concerns due to your specific diagnoses, please consult your doctor before eating yuca. 

Crazy For Yuca heart shaped logo with yellow writing.

Gluten-Free Grain-Free Banana Bread / Muffins

Gluten-Free Grain-Free Banana Bread / Muffins

I’m making this banana bread as I type up this post, and the incredible aroma as it’s baking has taken over the house! I can’t wait for it to cool off so I can take my blog pictures and dig in!!! Whether made into muffins 

Almond Cassava Flour Cookies

Almond Cassava Flour Cookies

Why should the gluten-free be denied scrumptious almond cookies from the Chinese restaurant? (After all, we already can’t have most Chinese food!) My daughter, who is gluten and dairy-free, had a hankering for almond cookies and asked me to create this recipe using cassava flour. 

Chocolate Cherry Chunk Cassava Flour Cookies

Chocolate Cherry Chunk Cassava Flour Cookies

A stack of 8 Chocolate Cherry Chunk Cassava Flour Cookies.

This is no ordinary chocolate chip cookie! While it has chocolate chips, it also has dried cherries, cinnamon, and is made from naturally gluten-free cassava flour! They’re soft-baked, with a melt-in-your-mouth crumbly texture, and just enough maple syrup sweetness. These are my go-to cookie when I need to bake a quick, easy treat for guests. They never disappoint!

Cassava flour is not only gluten-free, it’s grain-free, nut-free, soy-free, Paleo, Vegan, Autoimmune Protocol friendly, non-GMO, and full of whole-food goodness! If you haven’t tried it yet, these simple to make Chocolate Cherry Chunk Cassava Flour Cookies are a great place to start!

To learn more about baking with cassava flour see: Getting to Know Cassava (Yuca) Flour.

While cassava flour is very similar to wheat flour, it can be dryer. It, therefore, needs a greater amount of liquid than the same recipe would if wheat flour were being used. I tweaked this recipe at least 6 times before I found the right combination of cassava flour, coconut oil, and maple syrup, leading to this soft-baked, yet firm cookie, with just the right amount of sweetness.  I always create recipes with the least possible amount of sweetener required for it to be delicious (since I’m pre-diabetic.) Based on the 6 cookies I felt compelled to eat the day I came up with this version, I think I got it right! But feel free to add a bit more maple syrup or chocolate chips if you enjoy a very sweet cookie.

I use Otto’s Cassava Flour for all of my baking.

Click below to purchase Otto’s Cassava Flour online here! 


Otto’s Naturals 100% Natural Cassava Flour Made from Yuca Root Bag, 2 Pound
By ordering Otto’s Cassava Flour and other recommended products through our website we get a small commission which helps to support the maintenance of Crazy For Yuca. There’s absolutely no additional cost to you. All recommended products are ones that I use in my own kitchen. Thank you so much for supporting our efforts to bring you the latest yuca/cassava recipes!

 ***

A common complaint in the gluten-free community is that gluten-free versions of a favorite food don’t taste the same as the gluten-containing food one is used to. Because of this fact, I recommend making something totally new, instead of trying to re-create a beloved food. Gluten-free food is AWESOME! It’s just a little different. Finding new, delicious meals and treats to add to one’s repertoire makes a gluten-free lifestyle truly enjoyable, without any sense of deprivation!

I think we can all agree that no cassava flour, gluten-free, grain-free, dairy-free chocolate chip cookie is going to taste EXACTLY like a classic Toll House Chocolate Chip Cookie – so why try??? It’s just going to be a disappointing, lesser cookie! Am I right???

That’s why I set out to create a cassava flour cookie that contained chocolate chips, (because I have no plan to give up chocolate chips!) but is its own unique cookie creation. A cookie that stands on its own! A cookie that no one thinks is trying to be a typical chocolate chip cookie!

These Chocolate Cherry Chunk Cassava Flour Cookies truly achieve that goal! They have just the right amount of cinnamon, which pairs perfectly with the bursts of chocolate from the chips! The sweet, chewy cherries add an unexpected twist that puts these cookies in a class by themselves!

These cookies freeze perfectly! They can be made in advance and pulled out whenever company drops by. Just leave them on the counter for an hour and they’re like fresh baked cookies again! If I’m baking them just for my immediate family, we eat a few then put them right into the freezer. This prevents us from eating the whole batch in one day! It’s hard to pass a plate of these and not grab one every time!!! While in the freezer, they’re available to be quickly defrosted whenever anyone wants a snack. They even taste amazing straight from the freezer! (Just ask my husband who never defrosts one before eating it!!!)

Chocolate Cherry Chunk Cookies   

(Full printable recipe below)

Makes one dozen cookies.

Ingredients:

-3/4 cup Otto’s Cassava Flour

-1 egg – room temperature (I use a duck egg since I’m sensitive to the protein in chicken eggs, but any egg works.)

-1/3 cup organic coconut oil – melted / or Spectrum organic vegetable shortening (not melted)

-1 teaspoon pure vanilla extract

-1/2 cup organic maple syrup -room temperature

-1 teaspoon cinnamon

-3/4 tsp baking soda

-1/4 teaspoon pink Himalayan salt

-3/4 cup dried cherries – (I use Trader Joe’s Dried Bing Cherries – unsulfured, no sugar added.) They are large, so feel free to cut them in half, if desired.)

-1 cup dairy-free chocolate chips (I use Enjoy Life  Dark Chocolate Morsels, semi-sweet baking chips, or mega chunks)

Directions:

Preheat oven to 375 degrees. In a large mixing bowl, blend maple syrup, melted coconut oil (or room temperature vegetable shortening), egg and vanilla. In a second bowl, mix Otto’s Cassava Flour, baking soda, cinnamon, and salt. Combine wet and dry ingredients into one bowl. Once fully blended, add dairy-free chocolate chips and dried cherries.

A mixing bowl with cassava flour cookie dough batter with added chocolate chips and dried cherries, unmixed.

Stir to combine.

A mixing bowl full of Chocolate Cherry Chunk Cassava Cookie dough.

On a parchment lined baking sheet, divide dough and press down to form 12-14 cookies.

Raw Chocolate Cherry Chunk Cassava Flour Cookies on parchment lined baked sheet.

Bake on middle rack of oven for about 12 minutes, or until edges begin to slightly brown.

Baked Chocolate Cherry Chunk Cassava Flour Cookies on parchment lined baking sheet.

Enjoy your Chocolate Cherry Chunk Cassava Flour Cookies!!!

*****

*****

*****

Chocolate Cherry Chunk Cassava Flour Cookies
Prep Time
5 mins
Cook Time
12 mins
Total Time
17 mins
 

This is no ordinary chocolate chip cookie! Yes, it has chocolate chips, but it also has dried cherries and cinnamon. YUM!!! And since these cookies are made with cassava flour, they're naturally gluten-free and full of whole-food goodness! They're soft-baked with a melt-in-your-mouth crumbly texture, and just enough maple syrup sweetness. These are my go-to cookie when I need to bake a quick, easy dessert for guests. They never disappoint!

Course: Dessert
Servings: 12 cookies
Author: Lauren from Crazy For Yuca
Ingredients
Ingredients
  • 3/4 cup Otto’s Cassava Flour
  • 1 cage-free egg (room temperature) I use a duck egg since I'm sensitive to the protein in chicken eggs, but any egg works.
  • 1/3 cup organic coconut oil – melted / or Spectrum organic palm shortening (room temperature)
  • 1 tsp vanilla
  • 1/2 cup organic maple syrup -room temperature.
  • -1 tsp cinnamon
  • -3/4 tsp baking soda
  • -1/4 teaspoon Himalayan sea salt
  • -3/4 cup dried cherries - cut in half (I use Trader Joe's Dried Bing Cherries - unsulfured, no sugar added.)
  • -1 cup dairy-free chocolate chips (I use Enjoy Life brand dark chocolate morsels, semi-sweet baking chips, or mega chunks.)
Instructions
Directions:
  1. Preheat oven to 375 degrees. 

  2. In a large mixing bowl, blend maple syrup, melted coconut oil (or room temperature vegetable shortening), egg and vanilla.

  3. In a second bowl, combine cassava flour, baking soda, cinnamon, and salt.

  4. Combine wet and dry ingredients into one bowl. 

  5. Once fully blended, add dairy-free chocolate chips and dried cherries. Stir to combine.

  6. On a parchment lined baking sheet, spoon and press dough into 12-14 equal sized cookies. 

  7. Bake on middle rack of oven for about 12 minutes, or until edges begin to slightly brown.

  8. Enjoy!

*****

Subscribe to Crazy For Yuca for free recipes and tips for living happy, healthy and gluten-free delivered right to your inbox. Never miss a recipe!

Disclaimer– In Crazy for Yuca I write about my own personal health and diet journey.  My experience and recipes are not to be considered expert advice or suggestive that anyone follow any particular diet protocol.  Each person’s body and medical issues are individual and need to be evaluated by a medical professional.  If you have any concerns due to your specific diagnoses, please consult your doctor before eating yuca.

Paleo French Onion Soup

Paleo French Onion Soup

With this Paleo French Onion Soup topped with melted yuca dough, you won’t miss the cheese! This perfect pairing is deliciously gratifying in every way!!! Upon baking, the underside of the yuca gets soft and gooey, while the top browns just right! This Paleo variation 

Grain-Free Chicken Pot Pie

Grain-Free Chicken Pot Pie

Many panic when they find out they need to be gluten and/or dairy-free! I think one of the main reasons is fear of giving up their comfort foods. This Grain-Free Chicken Pot Pie recipe is true comfort food at its best! It’s proof positive that 

Gluten-Free Cassava Flour Cake Pops

Gluten-Free Cassava Flour Cake Pops

Valentine’s Day Cassava Flour Cake Pops

The time has come for the gluten-free and gluten-eating alike to enjoy cake pops together for all occasions!!! These pops are so incredible, no one will ever guess they’re gluten-free! Not to mention grain-free, dairy-free, soy-free, and nonGMO!!!

I must admit, I’m known for my cake pops! Making themed pops for holidays, special occasions, and gifts has been a little hobby of mine. I started making them years ago – (in my previous life) – before going gluten-free and eliminating processed food from my diet. I was still making them to bring to parties and other gatherings since they’re such a crowdpleaser, but I haven’t eaten them because they were full of crap!!! They were GORGEOUS, but I can’t think of anything less healthy to eat! I’d actually cringe a little when serving them, feeling like I was giving people poison wrapped up like a beautiful present!

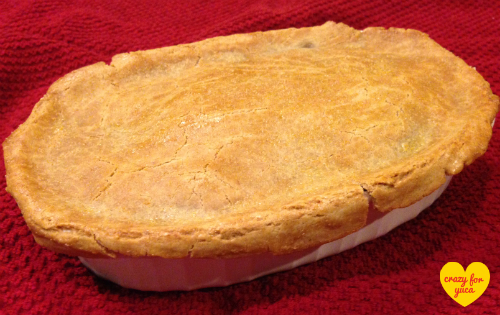
Those days are over now that we have Gluten-free Cassava Flour Cake Pops!

I set out to make healthy cake pops using Otto’s Cassava Flour and all natural ingredients and decorations. I must admit, I’m VERY happy with the results! They might not be as brightly colored as my pops from the past made with chemically dyed toppings, but they taste WAY better and are made of all “real” food. What can be better than that? I can’t wait to share this recipe with you!

You can make this basic Gluten-free Cassava Flour Cake Pop recipe, and then customize it to fit any holiday or occasion!

Here are my Holiday Cassava Flour Cake Pops. 

(See below for decorating instructions for each of these pops.)
Eight assorted holiday Gluten-Free Cassava Flour Cake Pops in Merry & Bright decorative Christmas box.

With these Gluten-Free Cassava Flour Cake Pops you can have all the fun with no guilt! (or at least very little.)

Otto’s Cassava Flour can be purchased in some specialty stores, or online here!


Otto’s Naturals 100% Natural Cassava Flour Made from Yuca Root Bag, 2 Pound

Many believe that making cake pops is difficult. While it is a bit time consuming, there’s nothing difficult about it.

Steps for making cake pops:

  1. Bake the cake.
  2. Once cake has cooled, shred it into crumbs.
  3. Add almond butter to crumbs and roll into balls (or whatever shape is desired.)
  4. Attach a stick to each pop with a little dairy-free melted chocolate.
  5. Freeze for 20 minutes.
  6. Melt chocolate.
  7. Dip pops into chocolate.
  8. Decorate with whatever toppings are desired.

Ingredients needed to bake the cake: (Makes 12 pops)

-3/4 cup Otto’s Cassava Flour

-1/3 cup organic coconut oil

-1/2 cup organic maple syrup

-1/2 teaspoon xanthan gum

-pinch pink Himalayan salt (chosen because of its purity and high mineral content)

-1 cage-free egg

-1 teaspoon pure vanilla extract

-2 cups melting chocolate (I use EnjoyLife Dark Chocolate Morsels or Pascha Dark Chocolate Chips – 55% Cacao. They are both gluten and dairy-free)

Ingredients to create pops

-1/4 cup Trader Joe’s Raw Almond Butter (or preferred nut butter)

-12 lollypop sticks

-cake pop stand or styrofoam to hold dipped pops

Let’s take it step by step in more detail. 

(*See full printable recipe below*)

Step 1: Bake cake:

In a large bowl, blend Otto’s Cassava Flour, xanthan gum and pink Himalayan salt. In a second bowl combine melted coconut oil, egg, maple syrup, and vanilla. Add wet ingredients to dry ingredient bowl and mix until fully combined.

Place batter into a small baking dish (about 7″ x 7″) lined with parchment paper (for easy clean up and toxin-free baking.) Any shaped baking dish can be used, since the cake will be crumbled after baking.

*The key is to use a baking dish that fits all the batter, with batter only about 1/2 – 3/4 inch deep. Cassava flour can be tricky to bake with in that the perimeter of cakes can cook faster than the middle, if the cake is too thick. This small, thin cake will bake quickly and evenly, without browning. Browned cake becomes too dry and doesn’t hold its shape well when rolled into balls. For best results, remove any browning after baking before moving to the next step.

Gluten-Free Cassava Flour Cake Pop batter in a bowl.

Be sure not to over-bake. The cake should be baked for 15 minutes – just until a fork inserted into the middle comes out clean.

Baked cake for Gluten-Free Cassava Flour Cake Pops.

Step 2: Allow baked cake to cool then break into crumbs. 

In a large bowl crumble cake, either with your hands or by raking with a fork, until it’s the consistency of coarse breadcrumbs.

Bowl of crumbled cake to make into Gluten-Free Cassava Flour Cake Pops.

Step 3: Add almond butter and thoroughly blend.

This is the “glue” that holds the balls together so be sure all crumbs are coated evenly.

Divide dough into 12 balls, rolling each between your hands as you would to make a meatball (or use a cake pop former if you have one.) This dough is highly malleable, yet holds its shape well, so use your imagination and create whatever shapes you want! (Below there are 2 oddly shaped “balls” that I was originally going to make into Santa hats, but then decided to stick with balls for this post.)

owl of crumbled cake to make into Gluten-Free Cassava Flour Cake Pops.

Step 4: Melt 1/4 cup chocolate in either a microwave or double boiler to use as “glue” to attach stick to each ball.

Dip the tip of each cake pop stick into chocolate, then push it through the center of each cake ball until it’s about halfway through the circumference of ball.

Stick dipped in chocolate to make Gluten-Free Cassava Flour Cake Pops.

Step 5: Freeze balls for 20 minutes.

Once all balls have sticks in them, place in freezer for 20 minutes while setting up for decorating. Pops can be made a day ahead, stored in the refrigerator overnight, then decorated the next day.

*Note: Overly frozen pops will contract in the freezer, then expand once thawed out. If pops are frozen for much longer than 20 minutes and then dipped into warm chocolate, they will eventually expand causing cracks in chocolate.

A baking tray filled with cassava flour cake pop balls with sticks inserted into the centers.

Step 6: Melt 1 cup chocolate chips in double boiler or microwave.

(I used Enjoy Life Dark Chocolate Morsels. They’re dairy, nut, and soy-free as well as non-GMO verified. Any preferred chocolate can be used. )

If using a microwave, heat chocolate in intervals of one minute or less to avoid burning. Stir in between each heating. A double boiler is the preferred method since there’s no risk of burning, and chocolate can be kept over a low heat or covered so it stays melted throughout decorating.

*Note: If using a double boiler, ensure that absolutely no water drips into chocolate, as this will seize the chocolate and destroy its smooth texture. Seized chocolate must be discarded.

Double boiler with melted Enjoy Life Dark Chocolate.

Step 7: Dip each pop into chocolate. 

Ensure that each pop is fully covered in chocolate, while allowing excess chocolate to drip back into pot. A thin coating of chocolate is preferred. Too much chocolate can drip down stick while drying, take too long to dry, or cause pop to become top heavy and fall off stick.

Step 8: Decorate pops any way desired.

If adding topping such as nuts, dried fruit, coconut, mini chocolate chips, sprinkles, colored sugar, decorate immediately after dipping into chocolate, as chocolate begins to dry very quickly (within a minute or two.) I like to set up my toppings in separate little bowls so I can dip my pops, then place toppings on quickly and easily.

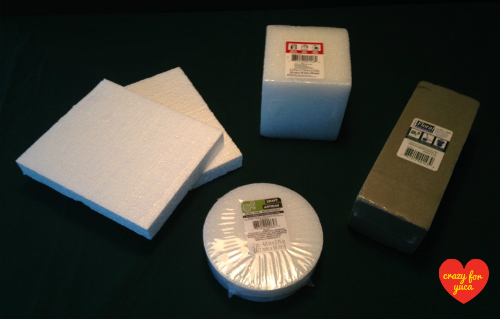
Once decorated, place each pop into a block of styrofoam (or cake pop holder if you have one) to dry undisturbed. I save large pieces of styrofoam that come as packaging to hold my drying cake pops. When creating decorative baskets and boxes for guests or gifts, I buy appropriate sized styrofoam shapes to fit inside whatever holder I’m using. These can be purchased at craft stores such as Michaels or at Dollar Tree (seasonal item, but each one is only 99 cents, so I stock up on varied sizes when I see them!) They’re typically used in floral arrangements to keep flowers in place.

For these Valentine’s Day cake pops I used a heart shaped cookie cutter so they would all be exactly the same size and shape. Since multiple layers of chocolate and colored icing was used, I allowed the first layer to dry fully before adding additional colors.

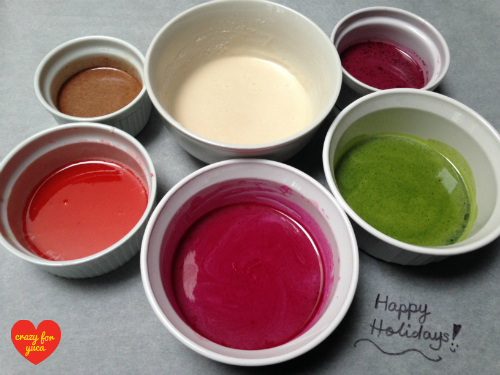
For the white icing: Blend one cup powdered sugar (sifted,) 1 teaspoon vanilla, and 1 tablespoon filtered water.

For the red icing: I added a few drops of Color Garden 100% Plant Based Red Food Color to the white icing. This food coloring is made of beet juice, turmeric, annatto, and less than 1% ethyl alcohol as a preservative. It’s the first natural food dye I’ve tried that gives a true red color!

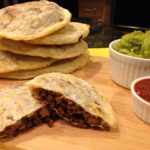
In the picture below I’m covering a pop with Enjoy Life Semi-Sweet Mini Chocolate Chips – a true chocolate lovers dream pop!!!

A cake pop being covered in Enjoy Life Semi-Sweet Mini Chips along with the bag of chocolate chips.

Here’s the finished chocolate chip cake pop. YUMMY!!!

Gluten-Free Cassava Flour Cake Pop rolled in Enjoy Life Semi-Sweet Mini Chips

There are many natural options to use to decorate your cake pops beautifully!

Six assorted Gluten-Free Cassava Flour Cake Pops

This pop was rolled in Trader Joe’s Organic Unsweetened Coconut!

Gluten-Free Cassava Flour Cake Pop covered in chocolate and coconut

This pop is covered in Trader Joe’s Unsalted, Dry Toasted Pecan Pieces! (I LOVE pecans, but any chopped nut can be used.)

A Gluten-Free Cassava Flour Cake Pop covered in chocolate and pecans

This cake pop was decorated with a combination of Enjoy Life Semi-Sweet Mini Chocolate Chips and chopped up Trader Joe’s Dry Roasted & Unsalted Pistachio Nutmeats! ……Oh yeah! That’s what I’m talking about!!!

A Gluten-Free Cassava Flour Cake Pop covered in chocolate chips and pistachios.

I love the colors of this pop that was decorated with chopped Trader Joe’s Golden Berry Blend. It’s a combination of golden raisins, cherries, cranberries, & blueberries! Who says deliciously sweet, pretty colored cake pops have to include candy and sprinkles filled with chemical dyes??? I think this one looks like a bouquet of flowers!

A Gluten-Free Cassava Flour Cake Pop covered in chocolate, dried cranberries, cherries, golden raisins and blueberries.

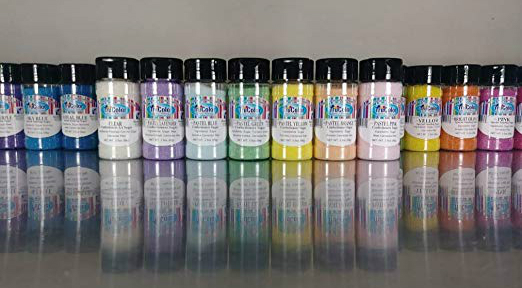
If a little green and red are desired for your holiday cake pops, consider this sanding sugar made by TruColor. Colors are derived from fruits, vegetables, roots, seeds & minerals, without synthetic FD&C dyes or artificial preservatives! It’s still sugar, but if one wants to use a colored sugar, this one holds up to pretty high standards.

A Gluten-Free Cassava Flour Cake Pop covered in chocolate and TruColor Sanding Sugar

Creating a few character cake pops for holidays and special occasions adds extra fun to your assortment. How adorable are these guys???

Gluten-Free Cassava Flour Cake Pops shaped as Rudolph the Red Nosed Reindeer and Frosty the Snowman

The antlers of this Rudolph the Red Nosed Reindeer pop was made with Trader Joe’s (are we starting to see a pattern here? – lol) Gluten-free Pretzel Twists. I cut off one side of each pretzel using a very sharp, fine knife, moved gently back and forth over the pretzel in a sawing motion. (I only broke 4 while perfecting these two!!) The nose is a dried cranberry from my Trader Joe’s Golden Berry Blend. The eyes are two Enjoy Life Semi-Sweet Mini Chocolate chips placed on top of white icing. (See recipe for white icing in description of the making of the snowman pop below.)

Gluten-Free Cassava Flour Cake Pops shaped as Rudolph the Red Nosed Reindeer

The basic white icing used for this snowman was a combination of 1 cup powdered sugar (sifted,) 1 teaspoon vanilla, and 1 tablespoon of water. (That was what I used for the whites of Rudolph’s eyes as well.) The snowman’s eyes are Enjoy Life Semi-Sweet Mini Chocolate Chips. His nose is a slice of dried apricot. His mouth was drawn on using the melted dipping chocolate applied with a toothpick. His adorable hat was molded from a piece of a blueberry RXBAR (a protein bar made with dates, egg whites, almonds, cashews, blueberries, and natural blueberry flavor.) It has a consistency similar to a tootsie roll.

Gluten-Free Cassava Flour Cake Pop shaped as a Snowman

Have fun decorating your pops! One can decorate cake pops simply, or as elaborately as one’s creativity allows.

Cake pops can be presented in a variety of ways. They look great simply placed in a coffee mug!

Five assorted Gluten-Free Cassava Flour Cake Pops in a white mug.

Various sized boxes or baskets can be inexpensively purchased to display cake pops in decorative ways. Each of these boxes was bought at Dollar Tree for $1 each. You can’t beat that!!!

Assorted Christmas decorative boxes.

These pops look like a party simply laid out in a fan shape!

Eight assorted holiday Gluten-Free Cassava Flour Cake Pops laid out in a fan shape.

These pops look great displayed in this little holiday box! When giving cake pops as gifts, I wrap decorative boxes of all sizes in cellophane, and tie them with curly ribbon for a truly professional look!

Five Gluten-Free Cassava Flour Holiday Cake Pops in decorative holiday box along with Happy Holidays Christmas sign with Santa.

I hope you enjoy your Gluten-Free Cassava Flour Cake Pops!!!

***

***

If you have any questions, reach out to me through the comments sections below and I’ll be happy to help in any way I can.


May your holidays be filled with the warmth of family and friends, food that truly nourishes you, good health, and peace. Warm regards – Lauren from CrazyForYuca.com

 ***

***

5 from 3 votes
Gluten-Free Cake Pops
Cook Time
15 mins
 

Nothing says fun like cake pops! They bring smiles and excitement to any dessert table! Finally, a cake pop that everyone can enjoy, whether gluten-free, dairy-free, or soy-free! They're so delicious, your guests will be shocked to know they're gluten-free!! (And you don't have to tell them!) These pops will be the talk of your holiday dinner or next party! 

Course: Dessert
Servings: 12 pops
Author: Lauren from Crazy For Yuca
Ingredients
For the Cake
  • 3/4 cup Otto's Cassava Flour
  • 1 pastured (cage-free) egg
  • 1/3 cup organic coconut oil - melted
  • 1/2 cup organic maple syrup
  • 1 tsp pure vanilla extract
  • 1/2 tsp xanthan gum
  • pinch Himalayan sea salt. Any salt can be used. I chose Himalayan sea salt because of the added minerals.
  • parchment paper
To Make Into Pops
  • 12 cake pop sticks
  • 1/4 cup Trader Joe's Raw Almond Butter
  • 1/4 cup Enjoy Life Dark Chocolate Chips - melted (to adhere pops to sticks) Enjoy Life Chocolate Chips are gluten, dairy and soy free.
For Dipping and Decorating - Any preferred nuts, dried fruits, or candies can be used. I used:
  • 2 cups Enjoy Life Dark Chocolate Chips - melted
  • Enjoy Life Semi-Sweet Mini-Chips - for decorating pops
  • chopped nuts of choice (I used Trader Joe's Unsalted Dry Toasted Pecan Pieces and Pistachio Nutmeats
  • Trader Joe's Organic Unsweetened Shredded Coconut
  • Trader Joe's Golden Berry Blend - (Mix of golden raisins, cherries, cranberries & blueberries)
  • Trader Joe's Gluten-Free Pretzel Twists (for reindeer antlers)
  • TruColor Sanding Sugar - red and green
  • 1 RXBAR (for snowman's hat)
  • cake pop stand or styrofoam block (typically used in floral decorating)
Instructions
For the Cake
  1. Preheat oven to 375 degrees

  2. In a large bowl, mix Otto's Cassava Flour, xanthan gum and Himalayan sea salt. 

  3. In a second bowl blend maple syrup, melted coconut oil, egg, and vanilla.

  4. Add wet ingredients to dry ingredient bowl and mix until fully combined.

  5. Line a small baking pan with parchment paper. (This step is optional, but allows for easy clean up as well as non-stick baking without greasing baking pan.) 

  6. Choose a small baking pan that allows for a very thin cake (batter depth about 1/2 -3/4 inch.) This will allow cake to bake quickly and evenly throughout, without browning.

  7. Bake for 15 minutes - just until a fork inserted into the middle of cake comes out clean. *Don't wait for browning to occur. If browning does occur, cut off browned parts before next step. Browned cake is too dry and will prevent pops from holding their shape once rolled into balls. 

  8. Allow to fully cool (about 15 minutes.)

To Make Balls
  1. In a large bowl, crumble the cake, either with your hands or by raking it with a fork, until it's the consistency of coarse breadcrumbs. 

  2. Add almond butter, mixing to ensure it's evenly blended throughout cake crumbs. (This is the glue that holds the pops together.)

  3. Form 12 equal sized balls, rolling them with your hands the way you would a meatball. (A cake pop former can also be used if you have one, but isn't necessary.)

  4. Place each formed cake ball on a parchment lined baking sheet or plate. (Wax paper can also be used.)

  5. Melt a small amount of chocolate (about 1/4 cup) either in the microwave or in a double boiler. (If using microwave, heat for one minute, stir, heat for an additional minute, stir.... until fully melted. Heating for longer than a minute at a time can burn chocolate.)

  6. Dip the tip of each cake pop stick into chocolate, then push it through the center of each cake ball until it's about halfway through the circumference of the ball. 

  7. Place the baking sheet with cake pops into the freezer for 20 minutes. (This allows pops to harden and adhere to the sticks so they won't fall off while being dipped in chocolate.) *Don't keep pops in freezer longer than 20 minutes. Pops that are too cold will contract, and later expand once they're dipped in warm chocolate, causing cracks in your pops. Pops can be kept in refrigerator overnight if decorating isn't being done on the same day. They can be dipped the next day without first putting them in freezer.

Decorating Cake Pops
  1. Melt chocolate in either the microwave (in intervals of no longer than 1 minute) or a double boiler (preferred method since there's no risk of burning, and chocolate can be kept over a low heat or covered so it stays melted throughout decorating.) *If using a double boiler, ensure absolutely no water drips into the chocolate, as this will seize the chocolate, destroying it's smooth texture. Seized chocolate must be discarded.

  2. Dip each chilled pop into melted chocolate, tipping the bowl of chocolate and slowly rotating the pop to ensure full coverage. (Don't roll pops in chocolate, as this can place too much pressure on pop and cause it to fall off stick.)

  3. Once pop is fully covered in chocolate, decorate immediately with chopped nuts, dried fruit, mini-chips, colored sugar, candy, etc. To make characters, additional embellishments can be adhered to pop with small dots of melted chocolate.

  4. Place pops in cake pop stand or poke holes with pop into styrofoam block and allow to dry.

  5. Display in any number of fun ways to serve to guests or to give as gifts.

  6. Happy Holidays to you and your family from Lauren at CrazyForYuca!

Disclaimer– In Crazy for Yuca I write about my own personal health and diet journey.  My experience and recipes are not to be considered expert advice or suggestive that anyone follow any particular diet protocol.  Each person’s body and medical issues are individual and need to be evaluated by a medical professional.  If you have any concerns due to your specific diagnoses, please consult your doctor before eating yuca.

Cassava Flour Holiday Sugar Cookies

Cassava Flour Holiday Sugar Cookies

Being gluten-free doesn’t mean missing out on the fun of holiday cookie baking! With cassava flour, you can make scrumptious gluten-free, whole-food sugar cookies that taste just like those made from wheat flour! If you haven’t discovered cassava flour yet, these Cassava Flour Holiday Sugar 

Icing Colored with Fruits and Vegetables

Icing Colored with Fruits and Vegetables

Can you believe that the icing for this Christmas tree cookie was colored with spinach? It’s true!!! And the tree trunk was colored with cinnamon! This year I thought I’d have a little fun experimenting with fruits, vegetables, and spices as natural dyes for the 

Apple Cinnamon Pop-Tarts

Apple Cinnamon Pop-Tarts

Apple Cinnamon Cassava flour "Pop-Tart" with a bite taken out of it

If you’re anything like me, “Pop-Tarts” were a staple of your childhood. When I was little my mother would leave a box of them in a lower cabinet so my brother and I could get breakfast for ourselves on weekends, and she and my dad could sleep a little longer. My favorites were strawberry frosted and apple cinnamon. YUM!!! I never understood why they were called “toaster pastries” since they were so much better right out of the box!

The thought of eating a processed pastry full of genetically modified wheat, tons of sugar (including high fructose corn syrup) and a bunch of preservatives for breakfast (or any time) is totally out of the question at this point in my life. However, we all need a little something sweet now and then, so here’s my philosophy:

If I’m going to eat dessert, I want it to be made out of “real food,” without any chemicals, additives, or GMOs. I choose natural forms of sugar to sweeten my treats, and use the least amount needed to make them delicious.  

In the “old days” if someone wanted cake or cookies, they had to bake them from scratch. I’m all for that! People actually had to use flour, water, butter, eggs, molasses and other “real food” ingredients. (Back then they weren’t genetically modified.) There were no boxed cake mixes or pre-packaged pastries filled with chemical additives, colors, and preservatives with a shelf-life of many years!! One must stop and ask, “What kinds of chemical preservatives are in food that contains eggs and milk, doesn’t have to be refrigerated, and can last in a box on a shelf for many years!” That’s definitely not something I want in my body. And while it does take some time and effort to bake from scratch, we shouldn’t be eating cake and cookies everyday anyway. They’re special treats. If we had to go the effort of standing in the kitchen and spending an hour baking every time we wanted some “junk” food we’d all be a lot thinner and a lot healthier!

  • A bit of trivia – The first boxed cake mix was made in the 1930’s by P. Duff & Sons. It was invented to address a surplus of molasses. The concept didn’t really catch on until after WW2 in the 1940s and 50s when processed, convenience foods took over the food industry.


Following my philosophy of eating “real food” with minimal amounts of natural sugar, I’ve re-created the Apple Cinnamon “Pop-Tarts” of my childhood into a gluten-free, grain-free, soy-free, dairy-free, low sugar pastry. Trust me, they have all the taste and satisfaction of the “Pop-Tarts” you remember, but none of the guilt (and none of the chemicals or high fructose corn syrup.)

These Apple Cinnamon Pop-tarts are made with Otto’s Cassava Flour (a gluten-free, grain-free, nonGMO, non-inflammatory, whole-food, amazingly delicious flour!)

Otto’s Cassava Flour can be found in some specialty markets or online by clicking below.

Otto’s Naturals 100% Natural Cassava Flour Made from Yuca Root Bag, 2 Pound


These cassava flour Apple Cinnamon “Pop-Tarts” have just the right amount of natural apple cinnamon sweetness on the inside, and pure organic maple syrup sweetened crust goodness on the outside!

Let’s make Apple Cinnamon Pop-Tarts

*Full Printable recipe below*

Ingredients for the Dough:

-1 1/2 cups Otto’s Cassava Flour

-2 tablespoons organic maple syrup

-1 pastured egg

-1/2 teaspoon xanthan gum

-1/2 teaspoon baking soda

-1 teaspoon pink Himalayan salt

-1/2 cup Spectrum Organic Vegetable Shortening (or pastured butter if you tolerate dairy)

-1/2 cup filtered water

Ingredients for the Filling:

-3 organic apples – peeled and sliced

-1 teaspoon organic coconut oil

-2 teaspoons cinnamon

-1/4 teaspoon pink Himalayan salt

-2 tablespoons juice from an organic lemon

-2 teaspoons tapioca starch

Ingredients for Icing (Optional)

-1 cup powdered sugar

-1 teaspoon vanilla

-2 teaspoons ground cinnamon

-1 tablespoon filtered water

-Optional -1 tablespoon colored decorative sugar (If you want them to look like classic “Pop-Tarts”) I use TruColor Natural Sanding Sugars (Red).

TruColor Natural Sanding Sugars come in a variety of colors to meet all your baking needs! I love them because they’re made  from Fruits, Vegetables, Roots, Seeds & Minerals! They contain NO SYNETHETIC FD&C DYES / NO ARTIFICIAL PRESERVATIVES. 

Click picture below to check out TruColor Natural Sanding Sugars so you will have them on hand for all your holiday baking!


Apple Cinnamon Pop-Tart Instructions:

It all starts with the apples! First, peel and slice 3 apples.

Whole apples, peeled apples, and a pile of apple skins.

Peeled apple, apple slicer, and a pile of sliced apples.


Place 1 tablespoon coconut oil into a pan on medium heat. Add sliced apples, 2 teaspoons cinnamon, 1/4 teaspoon pink Himalayan salt, and 2 tablespoons lemon juice. Cook 4-5 minutes until fork tender.

Sliced apples in a frying pan with cinnamon, lemon juice and salt.

Cooked sliced apples in a frying pan.


Place cooked apples into a food processor to blend into a smooth textured filling. For chunkier filling, place only half of the apples into the food processor and cut up remaining pieces into smaller chunks.

Make a slurry out of 2 teaspoons tapioca starch (which is made of yuca) and water. Add to apple mixture to slightly thicken it. Return to the stovetop and cook for a few more minutes to decrease any starchy flavor. Set apple filling aside while making dough.


To make the dough: In a large bowl, whisk egg. Add maple syrup and thoroughly blend. Then add Otto’s Cassava Flour, xantham gum, salt, baking soda, vegetable shortening or butter, and water. Blend with a spoon. When it gets all crumbly and difficult to mix, use your hands to fully incorporate ingredients.

Cassava flour pop-tart dough crumbles.


Pop-Tart cassava flour dough in a bowl


Roll out half the dough onto parchment paper and cut into desired shapes and sizes with a pastry wheel or pizza cutter. These will be the bottom halves of the “pop-tarts.”

Rolled out and divided cassava flour dough to be made into "pop-tarts." Rolling pin and pastry wheel.


Transfer each cut-out pastry bottom onto a parchment lined baking sheet and fill with a heaping tablespoon of apple filling. Roll out second half of dough into matching sizes and shapes for the pastry tops. Then dip finger in water and run wet finger along the perimeter of each pastry bottom. Carefully lay each pastry top over the bottom pastry and filling. Press down along edges to seal. For a decorative effect press with a fork all around the edges.

Making Apple Cinnamon Cassava Flour "Pop-Tarts." Section dough, fill with a spoonful of apple filling, cover with a second pastry. Seal.


Bake at 375 degrees for 25-30 minutes until edges begin to brown.

Baked Apple Cinnamon Cassava Flour "Pop-Tarts" on cooling rack.


Place cooked pasties on a rack to cool. While cooling, make icing (if desired.) Combine powdered sugar, water, vanilla and cinnamon until smooth. Once cool, drizzle icing onto each pop-tart.

With these pop-tarts, you control the amount of sugar by deciding how much icing to put on top. Other than the icing, the only added sugar in 8 pop-tarts is 2 Tbsp of pure organic maple syrup (about 3 grams each.) I added the colored decorative sugar to make these appear more like classic pop-tarts, but this can easily be eliminated to minimize the sugar.

Drizzle desired amount of icing onto each pop-tart using a spoon.

Drizzling icing onto Apple Cinnamon Cassava Flour "Pop -arts."


A baking tray filled with iced Apple Cinnamon Cassava Flour "Pop-Tarts."

Enjoy!!

3 Apple Cinnamon Cassava Flour "Pop-Tarts"


*****


These Apple Cinnamon “Pop Tarts” freeze really well and can be quickly defrosted for a warm, homemade treat any time! Either microwave for 30-45 seconds, bake at 375 in the oven or toaster oven for 10 minutes, or leave out on counter for about an hour.

I get really excited when I’m yearning for a sweet treat and I remember that these are in the freezer!

 ***

 ***


Purchase Otto’s Cassava Flour online here! so you can make these amazing grain-free Pop-tarts!!!

Otto’s Naturals 100% Natural Cassava Flour Made from Yuca Root Bag, 2 Pound

By ordering Otto’s Cassava Flour through our website we get a small percentage of the sale which helps to support the maintenance of Crazy For Yuca. There’s absolutely no additional charge to you. Thank you so much for supporting our efforts to bring you the latest yuca/cassava recipes!

***

***

Healthy Eating Tip: What is Spectrum Organic Vegetable Shortening?  It is expeller pressed organic palm fruit oil with some of its unsaturated fats removed to form shortening. Spectrum Organic Vegetable Shortening is a Non-GMO, Fair Trade certified, Rainforest Alliance certified, all vegetable shortening containing no hydrogenated fats. It has no flavor, no affect on the color of baked goods, and acts as a natural preservative extending the shelf-life of food. It adds flakiness to crusts, creaminess to icing, and crispiness to fries in a way that oil cannot. It has a high smoke point so there is no concern of rancidity at high temperatures, as is the case with many cooking oils. Spectrum Organic Vegetable Shortening has 1 ingredient – expeller pressed organic palm oil. Expeller pressing is a mechanical process that uses pressure to naturally extract oil from nuts and seeds. Expeller pressing is a much healthier process than chemical processing which uses hexane, a neurotoxic byproduct of gasoline production. A hexane residue can remain in the oil and the FDA doesn’t require testing for this. Since expeller pressing is more expensive and produces less oil, big manufacturers tend to use chemical processing. If choosing a vegetable shortening other than Spectrum brand, make sure the company procures their oils using sustainable methods that don’t contribute to deforestation, or displacement and mistreatment of native communities and workers, as has traditionally been the case.


***


Apple Cinnamon Pop-Tarts
Prep Time
1 hr
Cook Time
30 mins
Total Time
1 hr 30 mins
 

Now you can have fun, delicious "pop-tarts" without the guilt! Don't be deceived by the fact that these are gluten-free, dairy-free, grain-free, and low in sugar. These cassava flour "pop-tarts" have just the right amount of sweetness - with apple cinnamon goodness on the inside and a delectable flakey crust on the outside. Whether warm or at room temperature this satisfying treat really hits the spot! 

Course: Breakfast, Dessert
Cuisine: American
Keyword: apple cinnamon, cassava flour, dessert, gluten-free, Grain-Free, hand pie, pop-tart, pop-tarts, poptart
Servings: 8
Author: Lauren from Crazy For Yuca
Ingredients
For the Dough
  • 1 1/2 cups Otto's Cassava Flour
  • 2 Tbsp organic maple syrup
  • 1 pastured egg
  • 1/2 tsp xanthan gum
  • 1/2 tsp baking soda
  • 1 tsp pink Himalayan salt
  • 1/2 cup Spectrum Organic Vegetable Shortening or pastured butter (if you tolerate dairy.) Kerry Gold Butter is a readily available option
  • 1/2 cup filtered water
For the Filling
  • 3 organic apples - peeled and sliced
  • 1 Tbsp organic coconut oil
  • 2 tsp cinnamon
  • 1/4 tsp pink Himalayan salt
  • 2 Tbsp juice from an organic lemon
  • 2 tsp tapioca starch
Icing
  • 1 cup powdered sugar
  • 1 tsp vanilla
  • 2 tsp ground cinnamon
  • 1 1/2 Tbsp water. If icing is too thick, add additional water - 1 tsp at a time.
  • 1 Tbsp colored decorative sugar to sprinkle on top of icing (optional.) For a classic Pop-tart look.
Instructions
For the Filling
  1. Heat a large pan over medium heat. Add coconut oil.

  2. Add peeled, sliced apples to the pan.

  3. Add cinnamon, salt, and lemon juice. Cook 4-5 minutes until apples are fork tender.

  4. For a smooth textured filling, put cooked apple mixture into a food processor and blend for a few seconds until smooth. Don't over-blend. If a chunkier filling is desired, place only half the apples in food processor to blend, then combine with the rest of the cooked apples.

  5. In a small dish, mix 2 tsp tapioca starch with 2 tsp water to form a slurry. 

  6. Place blended apple filling back into pan on the stovetop, add slurry, mix, and cook for a few additional minutes to remove any starchy flavor from the tapioca.

For the Dough
  1. In a large bowl, whisk egg. Add maple syrup and thoroughly blend. Then add cassava flour, xanthan gum, salt, baking soda, Spectrum Organic Vegetable Shortening or butter, and water. Blend into a dough, first by mixing with a spoon and then using your hands to fully incorporate ingredients. If dough is too dry, add additional water - 1 Tbsp at a time. If dough is too wet, add additional cassava flour - 1 Tbsp at a time. 

To Assemble "Pop Tarts"
  1. Roll out half the dough on parchment paper. This will form the bottom layers of the pastries.

  2. Cut dough to the size and shape desired with a pastry wheel or pizza cutter. This recipe makes 8 -  3" x 3 1/2" "pop-tarts" (depending how thin dough is rolled out) but can be made into whatever size or shape is desired.

  3. Transfer each cut-out piece of dough onto a baking sheet lined with parchment paper.

  4. Spoon a heaping tablespoon of apple filling into the center of each cut-out piece of pastry, ensuring to leaving enough room around the perimeter for the top and bottom pastries to connect and be sealed together.

  5. Roll out and cut remaining dough to match the sizes and shapes of the bottom halves.

  6. Place 1/4 cup filtered water into a small bowl. Dip finger into the water and run wet finger along the edge of each pastry bottom.

  7. Carefully lay each top, cut-out pastry over bottom pastry with filling. Press down along the edges to seal. For a decorative effect press down using a fork around the edges of pastry.

  8. Bake at 375 degrees for 25-30 minutes, until edges begin to brown.

  9. Let cool before icing.

For the Icing
  1. Mix powdered sugar, cinnamon, vanilla and water until smooth. If icing is too thick, add additional water in 1 tsp increments until desired consistency is reached. Drizzle desired amount of icing over cooled "pop-tarts." Sprinkle with colored sugar if desired.


*****


Subscribe to Crazy For Yuca and receive free recipes and tips for living happy, healthy and gluten-free. Join the community and never miss a recipe!

Crazy For Yuca logo with a red heart with yellow writing


Disclaimer– In Crazy for Yuca I write about my own personal health and diet journey.  My experience and recipes are not to be considered expert advice or suggestive that anyone follow any particular diet protocol.  Each person’s body and medical issues are individual and need to be evaluated by a medical professional.  If you have any concerns due to your specific diagnoses, please consult your doctor before eating yuca.


Guacamole

Guacamole

 In my opinion, guacamole is the perfect condiment! It’s gluten and dairy-free, full of healthy fats, and is “whole food” at its best. Not to mention it’s creamy and delicious! Guacamole makes chopped up veggies WAY more fun, and is a perfect pair with many 

Cassava Flour Tortilla Wraps

Cassava Flour Tortilla Wraps

Whether right out of the pan or filled with your favorite toppings, these tortilla wraps are outstanding!  While cooking up a batch I literally have to stop myself from eating them all before I finish making them. They’re sooooo yummy on their own… especially warm! 

Baked Yuca Empanadas (Grain-Free)

Baked Yuca Empanadas (Grain-Free)


If you’re looking for a crowd-pleaser you’ve found it! Young and old, as a meal, side dish or an appetizer for guests, these empanadas are a hit with everyone! (Whether the person is gluten-free or not!) They can also be made with beans for a delicious vegetarian version.

*The printable recipe below shows both the meat and vegetarian options.*

Yuca makes a delectable dough! No need to be concerned that these won’t taste as good as those made with wheat or gluten-free flour. Yuca is no inferior, gluten-free choice! I’d argue that these are actually superior to traditionally made empanadas, not just in nutritional value, but in overall taste! I’ve made these for my family, guests, and for my Recipe Swap Club with 5 star ratings all around! No matter what I’ve made for my Recipe Swap Club since, someone always brings up how amazing the empanadas were at EVERY MEETING! They’re that memorable! Try them out for yourself and comment below to let me know what you think.

These Yuca Empanadas can be custom-sized to fit any need. Make little 3 inch appetizer-sized ones (pictured above.) They’re so much fun to eat with your hands and maybe dip into guacamole or salsa! Or make medium-sized, or even giant meal-sized ones!!

This Yuca Empanada recipe is what truly made me go Crazy For Yuca! It’s so perfectly crunchy on the outside and bursting with mouth-watering flavor on the inside! I cannot say enough about how much my family and I enjoy them. Everyone is ecstatic to run to the table on empanada night!

This is the way my husband loves them – slathered with salsa and guacamole! He just picks up the whole thing and takes a big bite! No forks or knives needed!!


The way my husband likes to eat empanadas - slathered in salsa and guacamole.


It’s still a bit hard to believe that a whole-food, non-inflammatory starch that’s filled with immune-building vitamin C and resistant starch can be this deliciously satisfying! Yuca is truly in a class by itself!!

***

Let’s make the yuca dough!

(Full printer friendly recipe below)

Ingredients: (4 servings)

-1 1/2 pounds fresh or frozen yuca

-2 tablespoons avocado oil – divided (plus additional to brush on empanadas just before baking.) I use Chosen Foods 100% Pure Avocado Oil. 

-1 teaspoon pink Himalayan sea salt– divided (I choose Himalayan sea salt because of its purity and rich mineral content as compared to other salt.)

-1 teaspoon garlic powder – divided

-optional – 1-2 tablespoons either tapioca flour, arrowroot flour, or coconut flour (used to decrease stickiness of dough. If dough is too sticky to work with, it can also be placed into refrigerator or freezer for a few minutes.)

parchment paper

Vitamix (or other food processor)


Check out Primal Palate Taco Seasoning, as well as their other high quality organic seasonings by clicking here:

To shop online for pantry items needed for this recipe, simply click on the ingredients listed in the above recipe or click on the Shopping tab in the menu at the top of this post.

*By purchasing items through our affiliate links we get a small commission which helps support the maintenance of Crazy For Yuca at no additional cost to you. All recommended products are ones that I use in my own kitchen. Thank you for supporting the efforts of CrazyForYuca.com to bring you the lastest yuca/cassava recipes when you shop online!


Fresh or frozen yuca can be used to make empanada dough.

If using fresh, be sure to peel yuca before boiling. For step by step directions on how to peel yuca, see: About Yuca: How To Peel Fresh Yuca (Cassava.) Jennifer from PredominantlyPaleo was the originator of “yuca dough.” I vary her recipe slightly to make these empanadas. See her dough recipe here.


Peeling fresh yuca/cassava with a knife.

Once fresh yuca is peeled, cut it into 3 or 4 pieces before placing it into a pot of boiling water. Frozen yuca (pictured below) is already peeled and cut. It’s as easy to make as boiling rice!

Goya frozen yuca in a bowl

Boil until fork tender (about 15-20 minutes.) Drain and discard water.

Remove stem. Once boiled yuca is cool enough to handle, place on a cutting board. Cut each piece in half lengthwise, remove and discard the stem that runs through the center. (That stick-like center will not be pleasant in your empanadas!)

Chop boiled, cored yuca into cubes before putting it in the food processor (the smaller the better to not over-heat the machine.)

Boiled yuca chunks

Pulverize into dough. Place 1 to 1 1/2 cup of yuca chunks into Vitamix (or other food processor) at a time, along with a pinch of Himalayan sea salt, pinch of garlic powder and a drizzle of avocado oil. Blend for about 30 seconds until yuca turns into a ball of dough. I never get tired of watching boiled yuca turn into dough in a matter of seconds! Watch the video below and you will see what I mean!

Place yuca dough ball on parchment paper. If too sticky to handle, I typically throw it into the freezer for 5-10n minutes and that usually does the trick. Adding a little tapioca flour, arrowroot flour, or coconut flour until it becomes manageable (just like bread dough) can also help.

See: Tips For Handling Sticky Dough.

Divide dough into balls, the number and size depending on desired size. One cup of yuca can make 6-8 appetizer-sized empanadas, 4 medium-sized ones, or one giant meal-sized one. (They are yummy no matter what size they are!!)

4 Yuca Dough Balls ready to rolled out.

Roll out each dough ball in between 2 pieces of parchment paper to form a circle.

Rolled out Yuca Dough ready to be filled with empanada filling.


While yuca is boiling, prepare Taco Meat

Ingredients:

-1 pound organic, grass-fed, ground beef, turkey, or chicken. (For vegetarian option I use 2 cans organic, BPA free black beans or lentils.)

-1 tablespoon avocado oil (I use Chosen Foods 100% Pure Avocado Oil)

-1 large onion – chopped

-2 cloves organic garlic – minced

-2 tablespoons Primal Palate Taco Seasoning (or gluten-free taco seasoning of choice, or a combination of salt, pepper, garlic powder, onion powder, chili powder, and cumin.)

Himilayan sea salt – to taste

lemon pepper – to taste


Saute onions and garlic with avocado oil in a pan. Add ground beef, turkey, or chicken (black beans or lentils for vegetarian option) and cook until no longer pink. Add taco seasoning, pink Himalayan sea salt, lemon pepper and cook a few more minutes.


Check out Primal Palate organic seasonings by clicking here:


Assembling the empanadas

Fill one side of each rolled-out dough circle with Taco Meat (or bean mixture,) leaving a rim of dough along the edge.

Fold dough in half to create a semi-circle, pinching edges together to seal in meat (or beans.) If dough sticks to your fingers, it may be easier to fold the entire piece of parchment in half, along with the dough, as pictured below. Brush top of empanada with avocado oil and sprinkle with a pinch of Himalayan sea salt.

Bake at 375 on parchment lined baking sheet for 20 minutes. Flip empanadas and bake for another 5-10 minutes until crust starts to brown and get crispy. Enjoy!!

These Latin delights can be made ahead and frozen, ready to be pulled out for a delicious meal or appetizer any time! Nothing makes my older daughter happier than being sent back to her apartment with a bunch of frozen empanadas to quickly heat up as a scrumptious meal any time! It’s hard to believe that you’re actually eating healthy when eating these empanadas, but you are!!!

Plated empanadas with one cut in half to see the meat inside.

Mini Yuca Empanada dipped in guacamole

*****

Healthy Eating Tip: Choose grass-fed beef. Many make big claims about the health benefits of grass-fed beef over grain-fed beef. At the same time there is research showing that the differences in the amount of debated nutrients are minimal. After reading the literature, I’ve decided to buy grass-fed mainly because cattle raised on a pasture have been proven to be healthier and are not injected with antibiotics. I don’t want to eat meat from cattle that are stressed and diseased as a result of their confined, unsanitary living conditions, then injected with antibiotics in order to manage the disease caused by this horrendous environment! I also don’t want to support such cruel practices! In addition, antibiotic use in animals increases the risk of antibiotic resistance in humans, which is a real concern for our future. It is also an agreed upon fact that grass-fed beef is much leaner and is higher in omega 3 fatty acids, which may reduce the risk of heart disease. Raising animals on a pasture is also good for the environment. It has been shown to decrease soil erosion, increase soil fertility, and improve water quality (due to decreased pollution) (1 , 2, 3, 4, 5.) The taste of grass-fed beef, compared to grain-fed, is slightly different, and the meat is not as tender (due to lower fat content.) It may take some getting used to for some people, but my family always enjoys it. Grass-fed is a bit more expensive, but I think it’s worth it. I shop at Trader Joe’s a lot and their prices are excellent. Their organic, grass-fed ground beef is $6.99 per pound! They also have Grass-Fed Angus Beef Strip Loin Steak in the freezer section for $9.99 per pound! (I feel like an add for Trader Joe’s right now!! I promise – I have no connection to Trader Joe’s and receive no money for promoting their products. I just love that store and feel so thankful that I live close to one!!! Not everyone is so lucky.) I have both in my fridge at the moment so I snapped a picture in case you are interested.


***

***


5 from 4 votes
Baked Yuca Empanadas
Prep Time
30 mins
Cook Time
45 mins
Total Time
1 hr 15 mins
 

These grain-free empanadas are deliciously crispy on the outside and bursting with Mexican flavor on the inside! Make appetizer or meal-sized ones. No matter the size, they'll be a hit with everyone!

Course: Appetizer, Main Course
Servings: 4
Author: Lauren from Crazy For Yuca
Ingredients
Yuca Dough
  • 1 1/2 pounds fresh or frozen yuca Equal to about 4 cups.
  • 2 Tbsp avocado oil - divided Plus additional to brush on empanadas before baking
  • 1 tsp Himalayan sea salt - divided
  • 1 tsp garlic powder - divided
  • 1-2 Tbsp either tapioca flour, arrowroot flour, or coconut flour (optional) Used to decrease stickiness of dough after pulverized
  • parchment paper
Filling
  • 1 pound organic, grass-fed ground beef, turkey or chicken For vegetarian option - substitute 2 cans of organic, BPA free black beans or lentils.
  • 1 tbsp avocado oil
  • 1 large organic onion - chopped
  • 2 cloves organic garlic - minced
  • 1-2 tbsp Primal Palate Taco Seasoning, or a combination of salt, pepper, garlic powder, onion powder, chili powder, and cumin.
  • Himilayan sea salt - to taste
  • lemon pepper - to taste
Instructions
Yuca Dough
  1. Bring a large pot of water to a boil.

  2. Meanwhile, if using fresh yuca, thoroughly peel and cut yuca into 3-4 pieces. See: How To Peel Fresh Yuca (Cassava). Frozen yuca is already peeled and cut.

  3. Place yuca into pot, ensuring yuca is fully covered by water. Return to a boil and cook for 15-20 minutes until fork tender.

  4. Once yuca is fork tender, drain water and allow to cool for a few minutes.

  5. Once cool enough to handle, place cooked yuca on a cutting board. Cut each piece of yuca in half lengthwise to remove and discard the stick-like center that runs through the middle.

  6. Cut boiled yuca into chunks (the smaller the better - to not overwhelm your food processor.)

  7. Place yuca chunks into food processor in batches of about 1cup (I use a Vitamix.) Add 1-2 tsp avocado oil, 1/4 tsp salt, and 1/4 tsp garlic powder per cup of yuca. 

  8. Blend until a dough forms. This takes about 30 seconds in a Vitamix, but may take longer in other food processors.  

  9. Spoon blended dough onto a cutting board lined with parchment paper. (Parchment is a non-stick surface and will help greatly with managing this sticky dough.)

  10. Divide dough into equal sized balls (the number of balls depends on the size of the empanadas you are making.) Each cup of yuca can make about 6-8 appetizer-sized, 4 medium-sized, or 1 giant meal-sized empanada.

  11. Optional - Sprinkle each ball of dough with a little tapioca, arrowroot, or coconut flour and knead into dough to decrease stickiness. Add as much as needed until dough can be handled without sticking excessively to your hands. It should look and feel just like bread dough. Dough can also be made less sticky by placing it into the refrigerator or freezer for a few minutes. 

  12. Using a rolling pin, roll out each ball between 2 pieces of parchment paper until it forms a circle. Remove top layer of parchment.

Filling
  1. While yuca is boiling, saute onion and minced garlic in 1 Tbsp avocado oil until slightly brown.

  2. Add ground meat and cook until meat is no longer pink. Drain fat. (Vegetarian option - substitute black beans or lentils.) Add 1-2 Tbsp Primal Palate Taco Seasoning, plus sea salt and lemon pepper - to taste. Cook for another few minutes to allow flavors to blend. Remove from heat and allow to cool slightly.

Assembling Empanadas
  1. Spoon filling on to one half of each rolled-out dough circle, leaving a rim of dough along the edge. 

  2. Fold each dough circle in half to create a half-moon shape and pinch the edges together to seal in the meat (or beans.) You may prefer to press edges together with a fork. (If dough is sticky or too thin, I fold the parchment paper in half along with the dough, push down edges to seal, then uncover parchment paper.)

  3. Place empanadas on parchment lined baking sheet.

  4. Brush the top of each empanada with olive oil. Sprinkle a pinch of Himalayan sea salt on top.

  5. Bake in a pre-heated oven at 375 degrees for 20 minutes on a parchment lined cookie sheet. Flip empanadas and cook for an additional 5-10 minutes, or until dough is slightly browned along the edges. Cooking time will vary based on empanada size.


***


***

 Here are links to ingredients and products I use to make Yuca Empanadas!


Vitamix 5200 Blender, Black
 

Chosen Foods 100% Pure Hand-crafted Avocado Oil (33.8-oz Bottle) Pack of 2


Chicken Taco Seasoning By Penzeys Spices 6.3 oz 1.5 cup bag

Kirkland Signature Non Stick Parchment Paper 205 sq ft (Twin Pack)
 
Westbrae Natural Organic Black Beans, 15 Ounce Cans (Pack of 12)

Natierra, Himalania Fine Grain Himalayan Pink Salt Shaker, 13 Ounce
Tapioca Flour, Gluten Free -Bob’s Red Mill – 2 / 20 Oz. Bags

Spicely Organic Arrowroot Powder 1LB Bulk Certified Gluten Free

NOW Foods Organic Coconut Flour,16-Ounce

Trader Joe’s Lemon Pepper Seasoning Blend with a Built in Grinder

***
By ordering recommended products through links on our website we get a small commission which helps to support the maintenance of Crazy For Yuca. There’s absolutely no additional charge to you. Thank you so much for supporting our efforts to bring you the latest yuca/cassava recipes! 


Try Amazon Prime 30-Day Free Trial
 

Yuca-ta Try These Cassava Flour Pancakes

Yuca-ta Try These Cassava Flour Pancakes

 “Yuca-ta” Try These Cassava Flour Pancakes got their name because no one can believe they’re made with anything other than wheat flour! The taste is truly indistinguishable! These pancakes have been taste tasted on my husband, my kids, and a bunch of their friends with 

The Perfect Yuca Chip!

The Perfect Yuca Chip!

The Perfect Yuca Chip! I’ve been busily perfecting my yuca chips! I tried fresh vs. frozen yuca, paper thin vs. slightly thicker slices, pan frying vs. oven baking, and 4 different seasoning variations! If you ask me, they’re all pretty terrific! But if I had 

Baked Yuca Fries

Baked Yuca Fries

Baked Yuca Fries in basket

Making yuca fries is super easy! It’s a perfect recipe to try when first experimenting with yuca (a.k.a. cassava.)

These fries are baked in the oven (not fried) so their fat content is low – yet their taste satisfaction is high!! They’re crispy on the outside and soft and deliciously chewy on the inside! It’s a slightly different experience than eating a french fried potato, but if you love one you’ll likely enjoy both!

You may wonder, “Why make fries out of yuca when I can just make them out of potato?”

While both potato and yuca fries are great, there are a few definite benefits to using yuca. The biggest difference has to do with how each affects blood sugar. White potatoes have a high glycemic index (GI), with french fries having a GI of 75. Values above 70 are considered high. Yuca (cassava) has a GI of 46, with values below 55 being considered low.

High glycemic foods cause blood sugar to surge, followed by a crash. This crash causes hunger to resume soon after eating, as well as cravings for more carbs, which can lead to weight gain. Low glycemic foods like yuca, release glucose into the blood slowly, providing a steady flow of energy over a period of time. Consuming yuca has been shown to keep people feeling full, and has been associated with weight loss. (See: About Yuca: Yuca (Cassava) Nutrition Facts.) As a result of their affect on blood sugar, potatoes are not recommended for diabetics, yet yuca is! If following a Paleo diet, potatoes are a “no-no” for most people, yet yuca is allowed! Yuca is even Whole30 approved! Potatoes are considered part of the “nightshade” family of vegetables, which for some people with digestive problems, food sensitivities, and autoimmune conditions could be contributing to their distress. In addition, unless potatoes are organic, they’re known to contain high levels of pesticide.

Yuca is a non-GMO, non-inflammatory, low glycemic, whole-food alternative to potatoes. Yuca is a win-win! Great taste and great for you!

Now you can eat fries without guilt!!

Baked yuca fries close up. with ketsup.


 Let’s make Yuca Fries!!!

(*Full printer-friendly version below*)

Ingredients:

-1 1/2 pounds fresh or frozen yuca. This is one bag of Goya Frozen Yuca or 2 small to medium sized fresh roots. Your fries will be equally delicious no matter which is used. Frozen yuca comes already peeled and cut into pieces so it’s a quicker alternative if you’re crunched for time. There’s no need to defrost frozen yuca before boiling.

-3 tablespoons fresh organic lemon or lime juice

-1 tablespoon avocado oil (I use Chosen Foods 100% Pure Avocado Oil)

-2 teaspoons pink Himalayan salt

lemon pepper – to taste (I use Trader Joe’s lemon pepper.)

Seasoning Variations:

1. If you’re a spice lover – get crazy and add a pinch or two of ground cayenne pepper! *Note: adding cayenne pepper would prevent these fries from being autoimmune protocol approved.

2. Trader Joe’s Onion Salt  is a perfect combo of minced and granulated onion, green onion, kosher salt and chives. Yummmm!! This gives a sour cream and onion flavoring to your fries. Try 1 -2 teaspoons along with 1/2 teaspoon pink Himalayan salt. Check it out by clicking below!

Trader Joe’s Onion Salt

3. Jada Spices Chicken Salt Lime is my newest discovery and it’s AWESOME on fries!!! It gives fries a salty lime flavor. And contrary to its name, is Vegan! It’s name is the result of it being a very popular spice in Australia to season chicken. Use 1-2 teaspoons. Check it out clicking below!

Jada Spices Chicken Salt Lime

4. Do your own thing! Experiment with the spice variations you love and comment below. I’d love to hear all about your creations!!!


Let’s Make Baked Yuca Fries!!!

*If using fresh yuca, it must be peeled before it’s cooked. See: About Yuca: How To Peel Fresh Yuca (Cassava) to learn how to do this quickly and easily. After peeling, cut fresh yuca into 3 pieces.

If using frozen yuca, it’s already peeled, cut into pieces, and ready to be boiled.

The next step is to boil your fresh or frozen yuca in salted lemon (or lime) water. This gives your fries a hint of added flavor infused throughout.

Once fork tender (about 15-30 minutes depending on the size of the yuca chunks), drain and allow to stand until it’s cool enough to handle.

Boiled yuca in a colander.


It’s important to remove the stick-like core that runs through the center of each piece of yuca.  It won’t be pleasant if these are in your fries. Place each piece on a cutting board and slice it in half lengthwise to expose the stem so it can be removed.

Removing stick-like stem that runs through the center of yuca/cassava.


Cut each yuca piece into fry shapes. You can choose how thick or thin to make them. I usually make mine about 1/2″ – 3/4″ thick. Place cut fries into a large bowl, add avocado oil and mix until all the fries are coated in oil. (I do this with my hands so I can feel when all the fries are well-coated.)

Yuca cut into frie-shapes and oiled.


Place the oiled fries onto a baking sheet lined with parchment paper.

Yuca fries on baking sheet ready to go into the oven.


Sprinkle with pink Himalayan salt and lemon pepper (or any other preferred seasoning.)

Bake at 425 degrees for 15 minutes.  Then flip fries with a metal spatula and cook for another 15 minutes.  Eat immediately!

In case of leftovers (which is unlikely) these fries reheat well and even taste great cold right out of the fridge!

Enjoy every bite with no guilt! Yuca is a truly healthy starch!


Yuca Fry Nachos for your next party! 


Yuca Fry Nachos make the perfect appetizer to bring out the smiles of your party guests! They also make a super fun meal – just ask my kids! These Yuca Fry Nachos are made with a combination of 3 simple recipes from Crazy For Yuca – Baked Yuca Fries, Taco Meat, and Guacamole. plus the addition of your favorite organic salsa! (I used Brad’s Organic Salsa – Mild.) YUMMY!!!


CLICK HERE TO SHOP

for pantry items and kitchen gadgets needed to make Baked Yuca Fries or any other Crazy For Yuca recipe. I personally use all recommended products in my own kitchen! 

CHECK OUT YUCA/CASSAVA SNACKS by clicking here or on the SHOPPING TAB in the menu above!

 All yuca/cassava snacks have been taste tested and approved by myself and my family! For a discussion of recommended yuca/cassava chips, see my post The Perfect Yuca Chip!

*By ordering recommended products through affiliate connections on our website we get a small percentage of the sale which helps to support the maintenance of Crazy For Yuca. There’s absolutely no additional charge to you. Thank you so much for supporting our efforts to bring you the latest yuca/cassava recipes!


Black banner with red and white writing invited readers to subscribe to comment below and share pictures of their Yuca Fries on Instagram @crazyforyuca.


***


Healthy Eating Tip: Use parchment paper to line your baking sheets and pans for easy clean up and healthier food! Since parchment paper is a non-stick surface, no additional oil is needed to prevent food from sticking to the pan. Parchment is a perfectly safe, non-toxic liner for baking. Never use aluminum foil for any cooking or baking involving heat. Foil has been proven to leach aluminum into food, with greater leaching in higher heat, with acidic solutions, and with foods which have added salt and spices. (1) Parchment paper is the mess-free, time-saving solution to healthy cooking and baking. It’s a critical staple in my kitchen pantry. I use Costco’s Kirland Signature brand. Check it out below to get these extra large rolls in a 2 pack and save money.

Kirkland Signature Parchment Paper


5 from 3 votes
Baked Yuca Fries
Prep Time
15 mins
Cook Time
45 mins
Total Time
55 mins
 

After having these yuca fries you'll never go back to potatoes again!  I love how they're perfectly crispy on the outside and soft and chewy on the inside.  They're such a satisfying side dish or snack.  Of course, you can always put some chili on top and make a meal out of them!

Course: Appetizer, Side Dish, Snack
Servings: 4 people
Author: Lauren from Crazy For Yuca
Ingredients
  • 1 1/2 pounds fresh or frozen yuca (This is one bag of frozen yuca or about 2 fresh roots)
  • 1 Tbsp avocado oil
  • 2 tsp pink Himalayan salt - divided
  • lemon pepper - to taste
  • 3 Tbsp lemon or lime juice (1 large organic lemon or lime)
Instructions
  1. Bring a large pot of water to a boil, along with 1 tsp Himalayan sea salt and the juice of a lemon or lime (about 3 Tbsp.) 

  2. If using fresh yuca - the peel must first be fully removed. (See: About yuca:  How to peel fresh yuca.)  Cut each peeled yuca root into 3 pieces (cut horizontally.)  If using frozen, simply place frozen yuca into boiling water.

  3. Ensure that yuca is completely covered by boiling water. Once water returns to a boil, cook yuca for 15 minutes (until just fork tender.) Do not over-cook. (Over-cooked yuca will be mushy and will not hold its fry shape well.) Drain water. 

  4. Preheat oven to 450 degrees.

  5. Once cool to the touch, cut each piece of yuca in half lengthwise (vertically) to remove stick-like center. 

  6. Cut into fry shapes and place into a large mixing bowl.  

  7. Add avocado oil and blend until fries are well coated.  

  8. Place oiled fries onto a baking sheet that is lined with parchment paper. Sprinkle with 1 tsp Himalayan sea salt and lemon pepper to taste.  (Or any seasoning variation you enjoy.)

  9. Bake for 15 minutes.  Flip fries over using a metal spatula and bake another 15 minutes.

  10. Eat immediately!  

Recipe Notes

These fries can be made with any number of seasoning variations. 

If you're a spice lover - get crazy and add a pinch or two of ground cayenne pepper!  

Trader Joe's Onion Salt is a perfect combo of minced and granulated onion, green onion, kosher salt and chives. It tastes like sour cream and onion flavor!

Jada Chicken Salt Lime gives these fries a salty flavor with a hint of lime. Delish!

Try any seasoning combination that you like!


Disclaimer– In Crazy for Yuca I write about my own personal health and diet journey.  My experience and recipes are not to be considered expert advice or suggestive that anyone follow any particular diet protocol.  Each person’s body and medical issues are individual and need to be evaluated by a medical professional.  If you have any concerns due to your specific diagnoses, please consult your doctor before eating yuca.

Heart-shaped Crazy For Yuca logo