
Have you tried baking with cassava flour yet? If not, this is the perfect cookie recipe to get you started! Whether you’re gluten-free, or just want to eat less grain, these cassava flour Strawberry Almond Butter Pinwheel Cookies are fun to make and to eat! They’re sweet, but not too sweet. A perfect pastry to serve to guests at your next dinner party or brunch, or to accompany your afternoon coffee or tea.
What is Cassava flour???
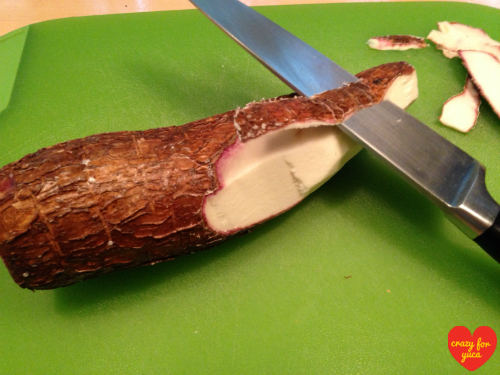
Cassava flour is a whole-food flour made simply by drying and grinding the white flesh of the peeled cassava root. (Cassava is also known as yuca.) Nothing is added or removed. It’s a pure, natural foundation for baking.
Cassava flour is a relatively new flour that’s gaining popularity within the healthy eating community. And why not? It’s gluten-free, grain-free, nut-free, soy-free, Paleo, Vegan, easily digested, and Autoimmune Protocol friendly! If that’s not enough to entice you, consider that cassava flour can replace wheat flour in a 1:1 ratio in most recipes, so it’s super easy to incorporate into your baking!!!
Making the swap to cassava flour adds wholesome, real-food goodness to your recipe without any sacrifice to the quality of your dish. The only things you have to lose are:
- -blood sugar spikes (cassava/yuca has a low glycemic index of 46)
- -potential intestinal upset (cassava is easy to digest and recommended for those with Irritable Bowel Syndrome)
- -bodily inflammation (wheat flour can be highly inflammatory)
- -fat intake (nut and coconut flours are high in fat)
- -allergic reactions (nut flours and wheat are highly allergenic)
- -possible triggering of autoimmune reactions (cassava flour is Autoimmune Protocol approved)
- -ingestion of bleached, processed flours that may contain additives
Cassava flour has a neutral taste and a texture similar to wheat flour (not grainy like some nut flours.)

If you are gluten-free, adding cassava flour (and yuca) into your repertoire is really a “no-brainer.” It will add so much back into your diet that you thought was lost forever.
*See additional yuca/cassava recipes in the recipe dropdown menu located at the top of this post. Discover how you can live happy, healthy and gluten-free with CrazyForYuca.com! Your days of feeling deprived are over!!!
For more information on the nutritional value of Cassava Flour see: Getting To Know Cassava (Yuca) Flour
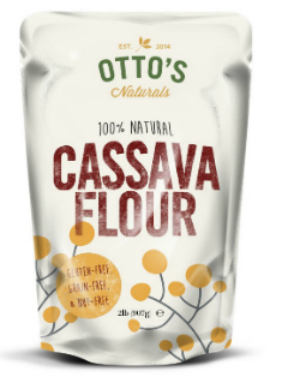
There are many reasons for this choice. First – it tastes great, practically indistinguishable from wheat flour! It has no fillers and is not enriched with anything. The only ingredients are cassava/yuca and water. Otto’s Cassava Flour is certified non-GMO, gluten-free, and Paleo. Many other cassava flours are made by peeling and then sun-drying the root. This allows fermentation which can create a sour tasting and musty smelling flour. Otto’s Cassava Flour is made in Brazil, (not Africa like some brands) where it’s peeled and baked according to their proprietary method – with no fermentation or opportunity for mold growth. As someone with autoimmune issues, avoiding mold is a top priority. Otto’s is the highest quality, cleanest tasting flour. If you tried a different brand of cassava flour and didn’t like the taste of your recipe, don’t give up before trying Otto’s. You won’t be sorry.
Otto’s Cassava Flour is available in small specialty markets or online here!
.
Otto’s Naturals 100% Natural Cassava Flour Made from Yuca Root Bag, 2 Pound

Let’s make Gluten-Free Grain-Free Pinwheel Cookies
*Printer-friendly recipe below*
Ingredients for cassava flour dough:
-1 1/2 cups Otto’s Cassava Flour
-2 tablespoons organic 100% maple syrup
-1 organic, cage-free egg (I use duck eggs since I’m sensitive to chicken eggs, but either can be used.)
-1/2 teaspoon baking soda (I use Bob’s Red Mill Baking Soda)
-1/2 teaspoon xantham gum
-1 teaspoon pink Himalayan salt
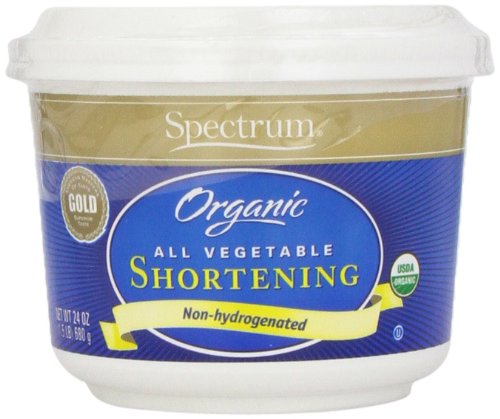
-1/2 cup Spectrum Organic Vegetable Shortening
-1/2 cup filtered water
What makes this crust so flakey and delicious?
Spectrum Organic Vegetable Shortening. Click below to check it out:
Ingredients for filling:
-1/2 cup raw almond butter – divided (I use Trader Joe’s Raw Unsalted Almond Butter)
-1/2 cup fruit spread – I use St. Dalfour Strawberry 100% Fruit Spread (Sweetened only with real fruit and concentrated grape juice.)
(-1/2 cup chopped raw or dry roasted pecans – divided (I use Trader Joe’s Dry Toasted Pecan Pieces)
-1 teaspoon cinnamon – divided (I use Primal Palate Cinnamon)
Check out St. Dalfour 100% Fruit Spread by clicking below: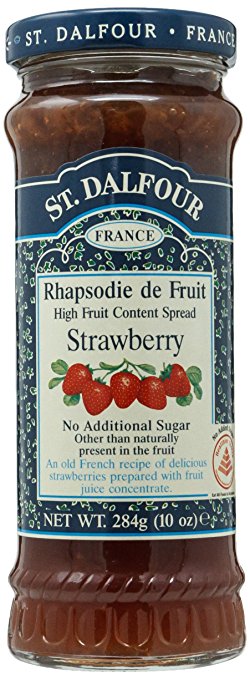
Topping ingredients:
-1 organic cage-free egg – whisked for use as egg wash
-1/4 teaspoon cinnamon (I use Primal Palate Cinnamon.)
-1/4 cup chopped raw or dry roasted pecans (I use Trader Joe’s Dry Toasted Pecan Pieces)
To make cassava flour dough: In a large bowl, blend Otto’s Cassava Flour, baking soda, xantham gum, and salt. In a second bowl, whisk egg and add organic maple syrup and water. Combine contents of the two bowls. Add Spectrum Organic Vegetable Shortening and blend until a dough is formed. Once mixing with a spoon becomes too difficult, use your hands to fully incorporate ingredients into a dough. (A stand mixer can also be used.)

Divide dough into 2 equal balls. Roll out each dough ball between 2 pieces of parchment paper to form the base of the Pinwheel Cookies.

Spread half of the almond butter (1/4 cup) on top of each piece of rolled-out dough, leaving a 1/2 inch plain edge along one side. (This will prevent filling from overflowing over the top of the pastry when being rolled up.)

Place half of the strawberry fruit spread (1/4 cup) on top of the almond butter, for each of the two rolled-out pieces of dough. Any preferred fruit spread flavor can be used for these Pinwheel Cookies. Some great options include apricot, blueberry, mixed berry, raspberry, or peach!

Spread fruit preserves evenly over almond butter, remembering to leave 1/2 plain edge on one side.

Sprinkle each rolled-out dough with half of the cinnamon and chopped pecans (or other preferred chopped nut.)

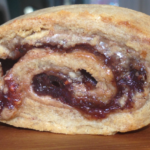
Starting with the end where the almond butter and fruit spread were spread right up to the edge, tightly roll dough from one end to the other into a jelly roll. I find it helpful to lift parchment paper to guide the dough. (Note: In the picture below I didn’t leave enough of a plain edge to prevent almond butter and jam from overflowing at the top. Oops! Live and learn! )

Ensure that pinwheel log is rolled-up as tight as possible (no air within the log.)

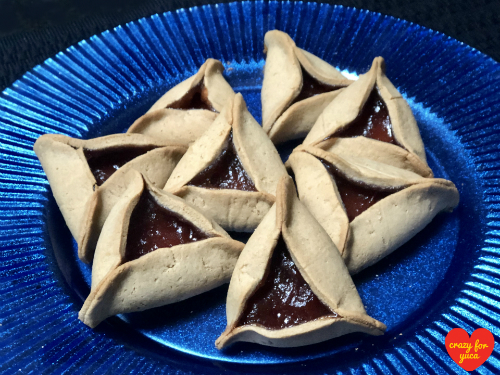
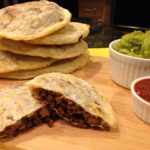
Rolled-up Strawberry Almond Butter Pinwheel Cookie log.

Wrap Strawberry Almond Butter Pinwheel Cookie logs tightly in either parchment or plastic wrap and place in freezer for one hour. (I prefer using the same parchment I just used to roll out dough. This prevents waste as well as provides a non-toxic wrap for my logs as compared to plastic wrap.) Placing Pinwheel logs into the freezer is needed to firm up ingredients so they will hold their shape during slicing into individual cookies. This will enable the creation of the pinwheel design. If sliced at room temperature, layers blend together during slicing. If frozen for longer than 1 hour, dough becomes brittle and crumby when slicing into cookies. If this occurs, simply leave log out on the counter for a few minutes before continuing to slice.

Remove logs from freezer, unwrap and place on cutting board. Use a sharp knife to slice each log into 12 Strawberry Almond Butter Pinwheel Cookies. Test readiness for slicing by starting at one end (since each end is unlikely to form a perfect pinwheel design.) It’s the proper temperature for slicing when a sharp knife easily slices through log without the dough crumbling or log losing its shape.

Place Pinwheel Cookies onto a cookie sheet lined with parchment paper. (The same piece of parchment can be wiped clean and re-used.)

Whisk an egg and brush top of each cookie with egg wash. Sprinkle with cinnamon and chopped pecans. Bake at 350 degrees for 20-25 minutes, until edges begin to brown.

Enjoy as a delectable dessert or as a pastry at your next brunch!

Chocolate Variation! Everything is delicious with chocolate – am I right???
For the chocolate version, simply swap 1/2 cup melted chocolate in place of the strawberry jam, and immediately roll after spreading chocolate and sprinkling cinnamon and nuts. Rolling will be hampered if chocolate is left to cool and harden.
I use Enjoy Life Dark Chocolate Morsels. I prefer dark chocolate because it’s lower in sugar. Enjoy Life dark and semi-sweet chocolate chips are both gluten, dairy, nut and soy-free as well as non-GMO verified. If you like your cookies sweet then you may prefer using semi-sweet chocolate. Click link below to check out Enjoy Life Morsels.
Enjoy Life Dark Chocolate Morsels, 9 Ounce

to check out yuca/cassava snacks and other recommended pantry items and kitchen gadgets used to make Crazy For Yuca recipes!
By ordering recommended products through our website we get a small percentage of the sale which helps to support the maintenance of Crazy For Yuca. There’s absolutely no additional charge to you, and shipping is always free. Thank you so much for supporting our efforts to bring you the latest yuca/cassava recipes!
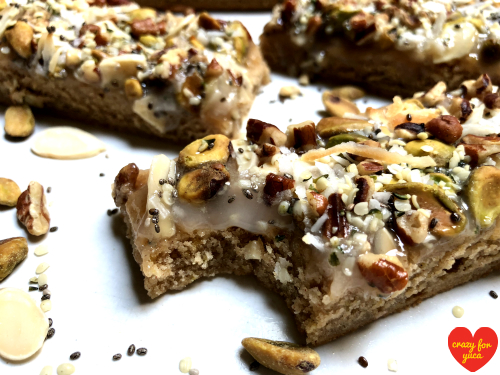
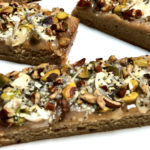
Yes, these Chocolate Pinwheel Cookies are as good as they look!!!


***
Healthy Eating Tip: Choose almond butter over peanut butter!
Both peanuts and almonds are a good source of protein, have heart healthy monounsaturated fats, have similar amounts of calories, contain fiber, and have vitamins and minerals such as potassium, biotin, magnesium, and zinc. However, there are a few big reasons to choose almond butter over peanut butter for optimal health.
One of the main reasons I limit my intake of peanuts is because they can be inflammatory within the body. Systemic inflammation is believed to be an underlying cause of many debilitating illnesses including heart disease, cancer, autoimmune disease, irritable bowl syndrome, type 2 diabetes, and chronic pain. Omega 6 fats cause inflammation, while Omega 3 fats reduce it. Peanut butter contains too much Omega 6 fats, which can disturb the healthy balance between Omega 3 and 6 fats within the body. While a 2:1 ratio between Omega 6 and Omega 3 fats is recommended, as a result of the Standard American Diet the ratio is more often about 20:1 (1.)
The second reason I choose almond butter is because almonds are alkalizing while peanuts are acidic within the body. We are susceptible to illness when the body is in an acidic state. Our blood should be slightly alkaline (just higher than a ph of 7.) Since most Americans consume an overabundance of acidic foods such as meat, dairy, wheat, sugar, alcohol, and coffee, it’s important to find areas to make swaps to more alkaline foods whenever possible to keep our bodies in balance (2, 3.)
A further problem with peanuts is that they are prone to mold growth. This is a major trigger for asthma, allergic reactions, as well as autoimmune disease (1.)
As compared to peanut butter, almond butter has significantly more iron, calcium, and vitamin E (an antioxidant that can stop the development of plaque within the arteries,) as well as 25% more monounsaturated fats (a further link to a reduction of heart disease.) Almond butter also has half the saturated fat as peanut butter (4.)
Overall, almond butter has clear advantages over peanut butter. If peanut butter is eaten, be sure to choose an organic brand with no additives, hydrogenated oils or added sugar. The ingredients should simply be peanuts or peanuts and salt. Choose peanut butter made with Valencia peanuts since they’re grown in a way that doesn’t promote mold growth. While eating peanut butter, eat foods or take supplements that contain Omega 3 fats to keep the Omega 6:3 ratio in balance (.1)
***
***

***
Strawberry Almond Butter Pinwheel Cookies (Grain-Free, Gluten-Free, Dairy-Free)
Ditch the grain with these incredible gluten and grain-free Strawberry Almond Butter Pinwheel Cookies made with cassava flour. You’ll never miss the grain! They’re the perfect to accompany your afternoon coffee or tea, brunch item, or dessert. They’re sweetened with only a touch of maple syrup and strawberry jam. Who says unprocessed, “real” food can’t be a scrumptious treat???
Cassava Flour Dough
- 1 1/2 cups Otto's Cassava Flour
- 2 Tbsp organic 100% pure maple syrup
- 1 pastured egg
- 1/2 tsp baking soda
- 1/2 tsp xantham gum
- 1 tsp Himalayan sea salt
- 1/2 cup Spectrum Organic Vegetable Shortening (*Pastured butter may be used if you tolerate dairy.)
- 1/2 cup filtered water
Filling
- 1/2 cup almond butter – divided
- 1/2 cup strawberry jam – divided. (Choose a low sugar variety with no additives or artificial sweeteners)
- 1/2 cup chopped raw or dry roasted pecans – divided
- 1 tsp cinnamon – divided
Topping
- 1 pastured egg – whisked for use as egg wash
- 1/4 tsp cinnamon
- 1/4 cup chopped raw or dry roasted pecans
Cassava Flour Dough
-
In a large bowl, blend cassava flour, xantham gum, salt, and baking soda.
-
In a small bowl, whisk egg. Add maple syrup and water and fully combine.
-
Combine the wet and dry ingredient bowl contents and add Spectrum Organic Vegetable Shortening. Blend into a dough, first by mixing with a spoon and then using hands to fully incorporate ingredients. If dough is too dry, add additional water – 1 Tbsp at a time. If dough is too wet, add additional cassava flour – 1 Tbsp at a time.
-
Split dough into 2 equal sized balls.
-
Place dough balls, one at a time, on a piece of parchment paper.
-
Roll out each of the 2 dough balls between 2 pieces of parchment paper until they’re about 1/4 inch thick.
-
Remove top piece of parchment paper and place each rolled-out dough, with bottom parchment, onto a baking sheet.
Filling
-
Spread half of the almond butter (1/4 cup) onto each of the 2 pieces of rolled-out dough, leaving a 1/2 inch plain edge along one side. (This will prevent filling from overflowing at the top of the pastry when rolled up.)
-
Spread half of the strawberry jam (1/4 cup) to fully cover almond butter. (Any preferred jam flavor can be used such as raspberry, apricot, peach, blueberry, mixed berry, etc.)
-
Sprinkle 1/2 tsp cinnamon evenly over each of the 2 rolled-out pastries.
-
Sprinkle half of the chopped pecans (1/4 cup) over each of the 2 rolled-out pastries.
Assembling Pinwheel Cookies
-
Starting with the end where the almond butter and jam were spread right to the edge, roll dough into a tight jelly roll. (I find it helpful to lift parchment to help guide the dough. See picture in body of post.)
-
Wrap each of the 2 individual Pinwheel Cookie logs tightly in either parchment or plastic wrap and place in freezer for one hour. (Placing logs in freezer is needed to firm up ingredients so they hold their shape during slicing – allowing for the pinwheel design.) The log is ready for slicing when a sharp knife easily slices through log without the dough losing its shape or crumbling. If crumbling occurs, the log froze excessively. Simply leave log out on counter for a few minutes before slicing.
-
Preheat oven to 350 degrees.
-
Place individual Strawberry Almond Butter Pinwheel Cookie slices on a baking sheet lined with parchment paper. (The same parchment can be used.)
-
In a small bowl, crack and whisk an egg.
-
Brush the top of each cookie with egg wash.
-
Sprinkle a touch of cinnamon on top of each cookie.
-
Sprinkle chopped pecans on top of each cookie.
-
Bake at 350 degrees for 20-25 minutes, until edges begin to brown.
-
Serve warm or at room temperature. Enjoy!!
Chocolate Variation: Substitute 1/2 cup melted chocolate for the strawberry jam in the recipe above. Melt and then spread chocolate directly over the almond butter on the rolled-out dough. Be sure to roll up the pinwheels immediately after spreading chocolate. Once chocolate cools it will harden and hamper rolling. All other instruction steps are the same for both variations. Use dark chocolate for a dairy-free, less sweet version or dairy-free semi-sweet chocolate for a sweeter cookie. I use Enjoy Life brand chocolate chips, as they are gluten, dairy, nut and soy-free as well as non-GMO verified.
*These freeze perfectly.
***

Disclaimer– In Crazy for Yuca I write about my own personal health and diet journey. My experience and recipes are not to be considered expert advice or suggestive that anyone follow any particular diet protocol. Each person’s body and medical issues are individual and need to be evaluated by a medical professional. If you have any concerns due to your specific diagnoses, please consult your doctor before eating yuca.


